Wednesday, March 6, 2013

It's Been a Year and I am... Still Alive


I never thought I’d be celebrating this, but happy birthday to my blog!!

It’s been a whole year since I've been There and Back Again. An entire year of my favorite recipes shared, my dry humor documented, science dropped, and bad jokes shoved in your face. A lot has happened in my life since I started this little endeavor. Too many things to list here, but the 2 biggest blessings are the new home my wife and I moved into and the new baby that is on an express train, due to arrive in a few short months. It doesn't take a lot to make me happy, but thinking about those two things puts a smile on my face on the cloudiest of days. Coupled with Seb and his fast growing, turning from a crawling baby to a nonstop toddler before my eyes, all make for one happy, happy man.

Judging by my numbers that I may or may not check more often than I would care to admit, it would appear the same people check my posts out regularly. To those of you that do, and you know who you are, I humbly thank you for taking your time to at least open the page. I surprisingly have a few posts that have some fairly high numbers for me, so the internet is doing something right in my favor. So to everyone else who has ever checked out my stuff – thank you. Yes, you’re special to me too.

While doing this for a year I've learned things I didn't know before. My standard that I gave myself sometimes forced me to look into why a certain process works and another doesn't or why something is named what it was named. I’m glad I gave myself that challenge for not only my education, but for you, my reader. From day 1 I knew I wanted people to walk away with something more than a recipe. I always tried to teach you the things I’ve learned in my career, and in my research. And more importantly, I always tried to talk you through the recipe rather than instruct you. My blog may not have a straightforward, traditional recipe card that’s easily printable, but I don’t think I’ll ever change my format from how I’m doing it now. Yeah, I talk a lot and I tend to ramble (like I’m doing right now), but that’s just the way I am.

…Because I have no one to talk for the better part of my days other than my kid and my dog.

As far as how the blog is doing, I’m happy with it. While it’s great knowing I’m getting my thoughts and recipes out there, I’m doing this for me just as much as I’m doing it for those that follow it. I looked back at my earlier posts and comparing them to what I’ve done lately, all I 
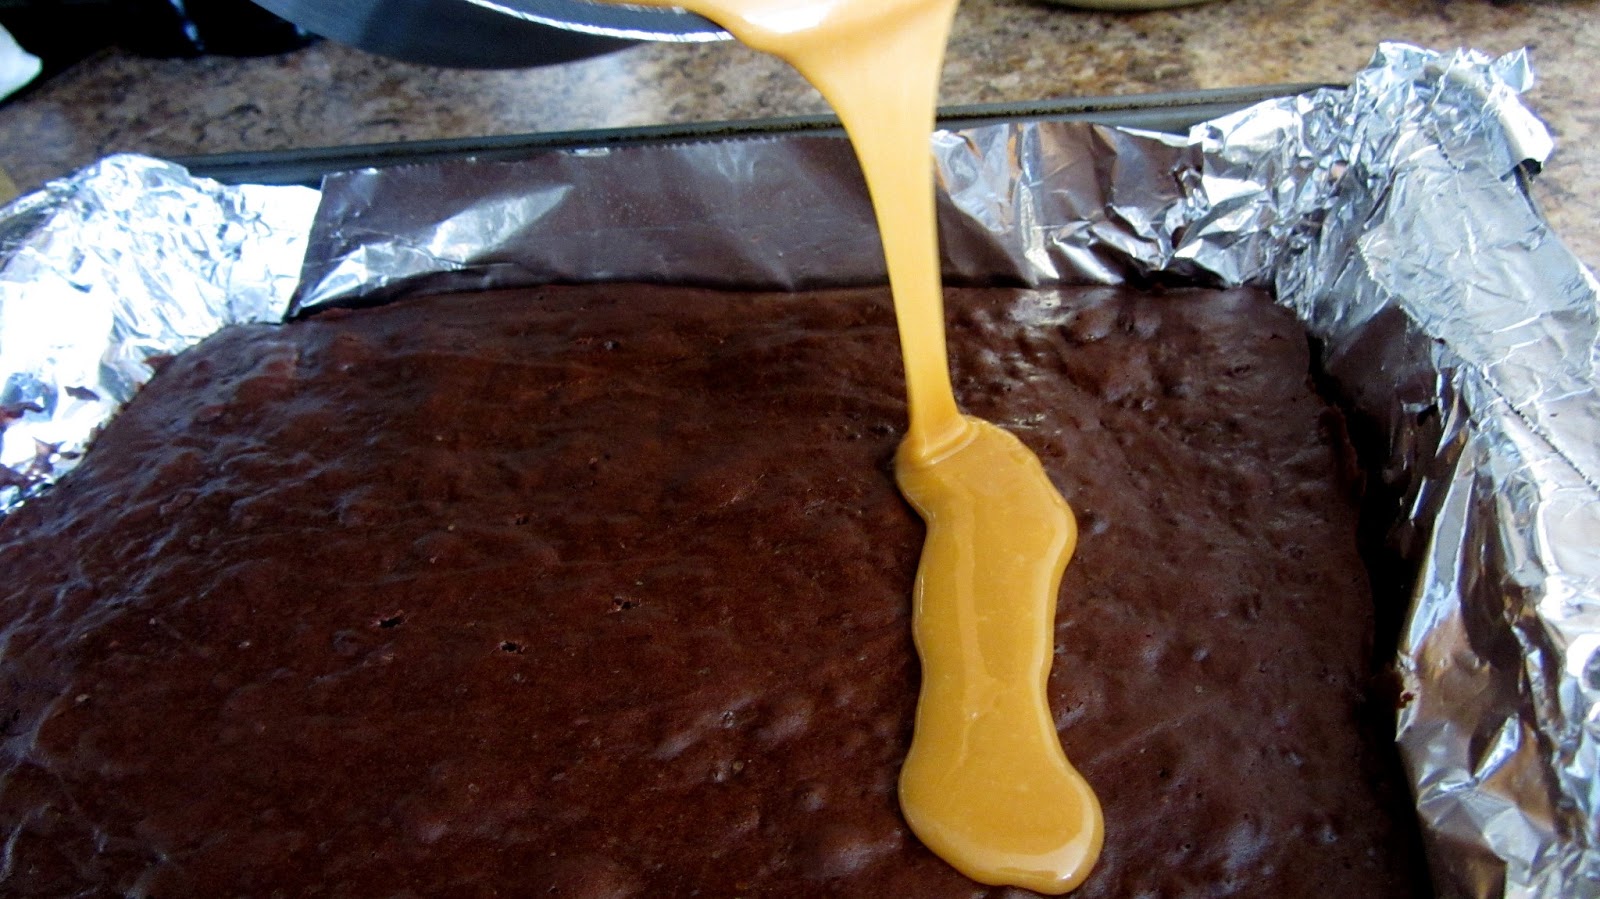
could think was… Holy crap, I put some terrible pictures on here! …Yeah, that’s pretty much all I could gather from any of it, they’re that terrible. I think I’m going to follow Jenn Bauguss’s advice and redo some pictures when I get the chance. I already started with my first post which was about Pancakes. When I started the blog we were living in an apartment and the kitchen got as much light as a dungeon. So now that I have a lot more natural light to play with I’m glad I can do better with less editing.

Oh, what? The pancake post doesn't have updated pictures you say? Hmm, that’s weird.

Oh! I know why… That’s because it’s actually here on this pancake post over at TheManTheChefTheDad.wordpress.com.

And there we have my gift to the blog: A makeover and a new home. Blogger has been good to me with no issues really. I just wanted to update the look and feel of everything and I felt like WordPress had more options for me as far as new looks go. So far, I am happy with the decision. I wasn't at first, heck, I quit WordPress at least twice before I finally grit my teeth and tried to make it work. It took some time to get it up to snuff, which explains where I've been since my last post on Valentine’s Day, but there is still plenty of work to be done. It’s at about 80% from where I want it to be, and 80% is good enough to unveil it for the birthday bash. Once everyone has transitioned I’ll eventually phase out this Blogger version of the blog. Yes, it will be a sad day but it’s a by-product of progression.

If you'd like an official welcome to my new home, check it out over at its Introductory Post.

I guess that’s that for now. I have a lot of things that I want to eventually do so I hope everyone is excited. I know I’m excited. Getting the WordPress site up and running has been crazy fun and it sparked a fire back in me for not only blogging regularly but for cooking. I've had the urge to do a lot of stuff just to blog it. Hell, I even bought dishes that don’t match for the sole purpose of picture taking! That’s gotta be one of the final steps in becoming a full on food blogger.

I already said it, but I’ll say it again… Thank you to everyone who has supported me throughout my 1st year. Kind words and simple acknowledgement mean more than anyone could understand. I hope everyone who visits here is entertained and finds what they’re looking for even though they may not have known they were looking for it. 

Thursday, February 14, 2013

Brownie Points


Alright, before you get all googly eyed and start to develop a puddle of drool on your keyboard, let it be known that I do not like these brownies.

When I walked into the kitchen to make them, I had a very different end product in my mind. It consisted of these brownies, topped with salt and a white chocolate butter cream frosting with all sorts of pizzazz on top of them. It was going to be the post that launched me into food blogger stardom! I was going to rule the world!! 

[strokes cat, clash of thunder]

But the butter cream failed to turn the color I wanted it to turn, because Heaven forbid the red food coloring I bought for this very purpose actually turned the cream red and not hot freaking pink. This was supposed to be my Valentine's Day post! I wanted red frosting on my brownies, not hot pink! The butter cream was a flop and it was pretty much downhill from there. I forgot to sprinkle the salt, the rest of the ingredients (which shall remain nameless) sit here unused because of the lack of frosting to stick to. By the time the brownies came out of the oven, I was already over them. As if they asked me to the prom and an hour later I caught them under the bleachers with my bff. 

Not right brownies.

Oh, and on top of that, they sit there and mock my sweet tooth! I take pride in my taste for sweet treats. I've always said I'm a dessert guy and would be the one to look at the dessert menu at a restaurant before the dinner menu. But these damn brownies and their overflowing goop of caramel that oozes out just by looking at it hard enough made me question myself. They make me feel like I'm one of you normal people when it comes to sweets. I don't know if it was the time it took to make them that made me weak or that they really are just that sweet. All I know is that I made them so they're going on the blog.

Don't get it twisted. If you're a chocolate and caramel fanatic then these are for you. I thought I loved caramel. But it's yet another kick to the groin these little demons are giving me while I'm already down.


Brownies from Hell:       (slightly adapted from here)


Brownie:

                     2 sticks ~ Butter
                           8 oz ~ Semi-Sweet Chocolate Baking Squares, chopped
                     1/4 cup ~ Cocoa Powder
                  1 1/4 cup ~ Sugar
                      4 each ~ Eggs
            1 tablespoon ~ Vanilla Extract 
                  1 1/4 cup ~ Flour
            1/2 teaspoon ~ Salt


Caramel Filling:

                      1 each ~ 14 oz Bag of Caramel Squares, unwrapped
                     1/3 cup ~ Heavy Cream


Notes:

  • These brownies will ruin your life.
  • You're going to need a 9 x 13 pan for this.
  • If you have chocolate chips but don’t have chocolate baking squares, I’m not going to cry about it.
  • If you've never bought caramel squares before, they’re in the grocery store, either in the same section as the chocolate chips, or in the candy aisle.


Ok, enough with the chit chat. Let’s make some cavities:


  • Turn your oven on to 350 and line your pan with either parchment or aluminum foil. I’m more of a parchment kinda guy when it comes to baking but since I’m all out I used foil. Take some butter and get a nice coating on the foil. Heck, to be safe go ahead and spray it with cooking spray too. You’ll understand when this monster comes out of your oven.


Now, when it comes to melting chocolate, depending on what I’m making or what it’s for, I’ll either use the microwave or set up a double boiler. I always like using a double boiler because I can control the melting better. I can stir and see exactly how the process is going rather than just wondering how it’s going from the outside of the microwave. To do a double boiler, just get yourself a sauce pan with about 2 inches of water and set it to boil. Then take a bowl, I use glass, and put your chocolate and whatever else you’re melting inside of it, and put the bowl on top of the sauce pan. You want the bottom of the bowl to fit just inside the rim of the pan, and you do not want to water to be touching the bowl. We’re using the indirect heat from the steam to melt the chocolate, not the water. The steam will melt it at a steady enough pace and once it’s done you just take the bowl off and you don’t have to worry about burning or overheating. 

But if you’re straight up melting chocolate and nothing else, you’ll want to be careful with water. One drop of water while melting your chocolate can ruin your entire week. If you want more info on that, check this page out since it’s not something we have to worry about right now.

If all of this sounds like too much, you can be lazy and put the chocolate and everything else in a microwave safe bowl and nuke it for 30 second intervals until it’s melted. It’s up to you.

  • Whichever way you go, put the chopped chocolate, butter and cocoa powder in a bowl and melt it until it’s smooth. Take it off the heat and let it cool for a few minutes until you can touch it and it doesn't feel hot. Warm is ok. We’re going to add eggs to this, and I don’t think you want chocolate scrambled eggs.


  • Once it’s cooled down, whisk in the sugar, the eggs one at a time, and the vanilla extract. When that’s all incorporated, stir in the flour and the salt but slowly.


Not because it’s flour and you can make a mess. I really don’t care if you make a mess or not, I’m not going to clean it up. No, stir slowly because you don’t want to over mix it. This is the reason why you always make brownies by hand and never with a stand or hand mixer. If you over mix the flour, you’ll create gluten. And gluten is not something you want in your brownies. They’ll come out cake-like and will be dry and flat as oppose to crumbly and soft.

  • When you stir in the flour, do it slowly, and stop stirring as soon as you see all of the flour incorporated.


  • Pour half, yes, half of the brownie batter into the prepared pan. Smooth it out, do whatever you have to do. It’ll look like it’s too thin of a layer, and you’ll question yourself up and down, but trust me, it’s fine. Just make sure it’s evenly spread out. Put it in the oven for 15 minutes.


While that’s baking, let’s work on the bane of my existence: the caramel filling.

  • Unwrap every single one of the tiny caramel squares. The annoyingly tedious, seemingly never ending, caramel squares.


  • Put them into a sauce pan with the heavy cream and put them on medium heat. Stir occasionally until you have a nice smooth caramel sauce


If my wife wasn't pregnant, I totally would've spiced this up with some Baileys Irish Cream. I don’t drink, but I know a few things. And one of those things is how happy-happy Baileys gets with caramel. Boy, oh boy…


Judging by how long it takes you to unwrap those hellish little squares, by the time the caramel sauce is done the brownie is probably out of the oven and cooled by now. 

  • Whatever the case, let it cool for 20 minutes or so when it does come out.


Once the brownie and sauce are ready, commence the sensual bonding and getting-it-on music…


Something I forgot to do in all of my excitement at this point, was to salt the caramel. So if you dig salted caramel, go for it. A little sprinkling with a sea salt should do the trick.

  • Once the caramel is poured on the brownie, take the other half of the batter and slowly and carefully pour it on the caramel. The batter got a little stiff on me after sitting there for so long, so I put it in the microwave for 10 seconds and it was fine.


  • Do the same you did for the first layer. Once it’s all in the pan, just spread it out until everything is evenly covered. It might be a little more difficult with the caramel there, but if you poured it around enough, it should be easy to just push a little around to the open areas. Again, it’s going to feel like you don’t have enough, but if you were good at splitting the batter in half, then you have nothing to worry about.

Leo and Mikey approve.

  •  Bake for another 15 minutes.


  • When it’s done, let it cool completely before you cut it

You can take it out of the pan using the foil, and just put it on a cooling rack, foil and all, till it cools. But just don’t cut it for at least an hour or two. Why? You just baked caramel sauce at 350°. You might as well have lava in that brownie.

When it’s ready, cut it up and watch it bleed like the heathen it is.


While writing this, I kept thinking on how I was taken aback by the river of caramel that flows in your mouth with each bite. I thought of how I can enjoy these after making them. And it hit me: Put one in a bowl, microwave for like 30 seconds and then plop a couple of scoops of ice cream on there with some chopped nuts…. I think I’d be able to handle that quite well. 

Tuesday, February 5, 2013

Alfredo is my Middle Name


If I knew I would live after the fact, I would have no problems injecting Alfredo sauce into my veins. It's easily one of my favorite sauces and I think a lot of it has to do with my unhealthy obsession with parmesan cheese. Seriously, give me a piece of wood, and if it has enough parmesan on it, I'd probably eat it. 

In my eyes, Alfredo sauce is not used nearly enough as it should be. Yes, tossed with fettuccine is the usual, most common way to scarf it down. But if you're not shy you can throw it in a potato or vegetable gratin, use it as the base for your mac and cheese (holy crap, yes), make a white lasagna with ground sausage, put together a dip with spinach and artichoke hearts or just as a dip by itself! Over tortellini, ravioli,  farfalle (bow tie pasta), fusilli (corkscrew pasta). Lord help you if you've never had Alfredo pizza. I know this may be somewhat blasphemous where I come from in New York, but if I had two pizza pies sitting in front of me, one Alfredo and one regular.. I'd probably pick the Alfredo one.

Yeah, I said it.

There are hundreds of things you can do with it and thousands if you count the additional ingredients like spinach, shrimp, chicken, sausage, etc...

I know there's a good chance you probably know all of this. But the thing is, there's probably an even better chance that the only time you come in contact with Alfredo sauce is when you buy it at the store or go out to one of those restaurants. 

You know, the restaurant that claims they're authentic Italian cuisine when the only thing authentic about them is the Grade-A guano they feed you about schools in Tuscany or their "fresh" pasta. 

I'd get more into that but that's another post. Besides, I'm too busy talking about Alfredo sauce:


Alfredo Sauce


                    1 quart ~ Heavy Cream
          1 tablespoon ~ Butter 
        2 tablespoons ~ Garlic, chopped
               1 1/2 cups ~ Grated Parmesan Cheese

                   To taste ~ Salt and Pepper


Notes:

  • Yes. Seriously. That's it.
  • This recipe will make enough sauce for a family of four. I like to make enough for leftovers the next day. If you don't, then just cut everything in half. 
  • The Parmesan cheese is the most important factor here. The type of cheese you get will effect the taste of sauce. Get a cheap, dollar store cheese and it'll taste like dollar store sauce. Get a nice dark wedge of Parmesan and you'll make the best Alfredo sauce you ever tasted. I don't go all out. Store brand shredded cheese is good enough for our family nights. But if you want to impress someone, get a wedge from the deli section and grate it yourself. You'll tell the difference.
  • Try and use grated. I buy shredded, as I said, and I chop it up before putting it in. What I recommend is a trip to the food processor if you go that route because parmesan isn't the best melter. So you may end up with chunks and strains in your creamy cheese sauce. If it's grated, it'll dissolve/melt better.
  • I'd keep leftovers in the fridge for a few days but I wouldn't freeze it. You could, but when you reheat it, it won't be the same. The flavor, the consistency, everything will be off. 
  • I make this in a shallow, heavy bottomed pot. If your pot is light, be careful, this scorches easily if not watched constantly. You'll be safer with something heavy. Also, try not to use something with a non-stick surface because you'll be doing some whisking.


I've been making this sauce from scratch for a long, long time. It's another of my OG recipes from when I first started cooking. It was taught to me by a friend in Culinary School, and I was dumbfounded by how simple it was. He had a different technique of doing it, and he also didn't use any butter, which I'm fine by doing. Before putting this recipe up I made it a few times to make sure I got it right. Tried once with a slurry, once with a roux and once with nothing to thicken it. When I make it at home usually, I admit, I cheat a little and use a slurry to thicken it up. Nothing wrong with it, but if you do it right the first time then you don't need anything to thicken it up. The roux was ok but unnecessary. It tasted a little different but that could have been from the cold I had that week. Mainly it was just extra ingredients/steps that this simple recipe doesn't need. Lastly I did it right. What's the one way to guarantee you do it right? Patience. You don't need to set aside hours, but you will need at least 15 minutes of standing by the stove. You know, just in case. If you've cooked with cream before, you know what I mean. Every time I made it before I was rushing, trying to get dinner ready for the wife when she got home. But if you take your time, you'll find the slight reduction of the cream and the natural creaminess of the cheese will thicken the sauce very nicely. 

How nicely? Let's find out:

  • First thing you want to do is chop up your garlic, but first, cut off and discard the root end. You don't want those floating around your sauce.


  • Put your pot on medium heat and melt the butter with the garlic. Saute until there is a little color to the garlic. You don't want to cook it till it's brown so be ready with the cream when the color starts to change. 

Do what I say, don't do what I do.


  • Add the cream and stir occasionally till it starts to steam. When it starts to steam, add the parmesan cheese by the handful, whisking with a whisk constantly.


  • Once all the cheese is in, turn the heat down to low and keep whisking every few minutes. It doesn't need to be a full on boil, so if it's going nuts boiled, try and turn it down lower. And don't walk away and start doing something else, if you let it go for a bit without whisking, the cheese will probably burn at the bottom. Give it about 15 or 20 minutes and the sauce will thicken naturally. Give it less time if you're doing less than a quart of cream.


  • Add some salt and pepper. If it needs more, add more until it tastes like Alfredo sauce to you. Once you finish with the salt and pepper, you're done. Stick a straw in it and drink some, put some in a bowl and give yourself a sponge bath, put it in an ice cream maker and make some Alfredo ice cream. ....Ew, no. Don't do that. 


If you have some fresh parsley you can add some to the sauce with no problem. If not, who cares, it's awesome anyway.
 

Wednesday, January 23, 2013

Put de Curry in de Co-co-nut


Sorry. I know you guys have probably been snowed in and made prisoners in your own homes by the below freezing temperatures hitting most of the nation. Just sitting there bundled under mountains of blankets waiting for me to update my blog with another soul warming soup. But like always, I miss these opportunities that other bloggers write posts for months in advance.

It's not my fault this time! Yes, I could have written this a week ago, but I was distracted. See, season 3 of Game of Thrones premiers on March 31st and my amazing wife surprised me with the third book in the series, A Storm of Swords, as an early Valentines gift. So yes, while you've been freezing, waiting for blog updates, I've had my nose buried in a book. I know, I'm terrible, I'm sorry. I'll never do it again and I promise I'll give you more attention.

...After I finish the book. So let's hurry this up so I could get back on it.

I first had this soup in the Animal Kingdom Lodge at Walt Disney World in a restaurant called Boma. It's a great buffet style place if you're ever in the area. When we tried this soup, both the wife and I were blown away. The flavors, while not usually paired to anything we've had, went perfectly together. A couple of weeks later I found a recipe and recreated the magic. And now, for you, I've done it again:


Coconut Curried Chicken Soup:     (adapted from here)


                                  1 each ~ Chicken, whole, cut in 8
                            1 1/2 each ~ Onion, medium, roughly diced
                                  1 each ~ Red Bell Pepper, roughly diced
                        1 tablespoon ~ Garlic, chopped
                                     Roux ~ 4 tablespoons butter, 4 tablespoons flour
                                  1 each ~ Coconut Milk, 13 oz can
                      3 tablespoons ~ Curry Powder, toasted
                           1 teaspoon ~ Dried Rosemary
                                  1 quart ~ Chicken Stock
                               5 ounces ~ Honey
                                  1/2 cup ~ Cilantro, chopped
                                  to taste ~ Cayenne Pepper, Salt, Pepper


Notes:


  • I understand you may not have the technical prowess to cut a whole chicken into its 8 equal pieces (2 each of breasts, wings, thighs and legs). So if you'd like, you can buy it already cut, Or just use 4 or 5 nicely sized chicken breasts. 
  • If you scratched your head when you read the word Roux then relax. A roux (pronounced "ru") is one of the many ways you can thicken up a sauce or a soup. It's one of the more traditional thickening agents and when done right, will not add any wild flavors to what you're making (unless you want it to). It will just do it's job and magically thicken what you want to thicken. 
  • Yes, toast the curry powder. No, it's not a waste of time. When you toast a spice, you're bringing out natural oils and enhancing not only the flavor but the fragrance of the spice. And when you enhance the fragrance, you're making the spice stand out more in the dish to not just your nose, but your taste buds as well. So to toast, just get a nice dry pan and put the curry powder in it and turn up the heat. Swirl it around and let it heat up to the point where the smell is filling the air. 
  • I omitted jalapeno peppers, potatoes and tomatoes from the original recipe. While they'll give the end product more layers, I'm not a big enough fan of either in soups to have them in here.  
  • We're going to do this all in one pot so get your favorite one out.


Now, let's put the curry in de co-co-nut and drink 'em bot' up:


  • First, turn on the oven to 350. Then as always, make sure everything is ready to go. Cut all your veggies, get everything out of your pantry, just be prepared. In the industry we call this Mise-en-place (miz on plas). It's a French phrase meaning "everything in place". You'd hate to have your roux ready for the liquid and then no idea where your coconut milk is. Be ready!


  • Part of your mise-en-place is preparing the chicken. So whether you cut it up yourself or are going the easy route, take salt, pepper and 1 tablespoon of curry powder and season the chicken. I cooked skin on but took it off later, so be sure to get underneath the skin as much as you can with all the seasonings. 


  • In your pot, heat up some oil and sear the chicken on all sides. Cook it about halfway if you can, then set the chicken on a sheet tray and put it in the oven for about 10 minutes (depending on how long you cooked it in the pan).

The recipe I got this from had you cooking the chicken 3/4 of the way and then letting it finish cooking in the soup. There are plenty of things I find wrong with this method, but most of all, I just don't have the time to sit there and wait for chicken to finish cooking inside of my soup. So I just finished cooking them in the oven. 


  • Now that you have all the goodness in the pot from the chicken, add a little more oil and throw in the onion, pepper and garlic. Saute it until the onions are translucent.


  • Usually, when you make a roux, you make it on the side and add it in while whisking. Well here we're twisting it a bit. So add the butter and the flour to the veggies and make your roux in the pot. 


  • Once your roux is together, go ahead and add the chicken stock, coconut milk, rosemary and curry powder. Whisk it or turn it with a spoon until you feel all of the roux has been incorporated. Once it comes to a boil, it will thicken up. If it does thicken before you're ready to continue then set it aside. But while it's thickening, your chicken should have been out of the oven and should look something like this...


  • Take the chicken and cut it up into bite sized chunks. This is the point where I took the skin off and may or may not have ate it. If you want to leave it in, be my guest. If you are using all breasts then chop it all up. If you're using a whole chicken, I cut up the breasts and the thighs and it gave me enough meat to work with. I saved the legs and wings as appetizers for the soup. 


  • Once the soup is thickened and the chicken is cut, go ahead and add the chicken to the soup. Add the honey and then give it a taste. It will need salt and pepper so add it. If you're looking for a little more kick, add the cayenne pepper a pinch at a time.


  • When it's all seasoned, add the cilantro and you are ready to bathe in it! 

It's a great soup to get cozy with especially if you have a nice, hot, crispy loaf of bread with it. Like I said, the flavors that work together here are phenomenal and are hard to put into words. So give it a go and see for yourself.