Showing posts with label Sides and Appetizers. Show all posts

Thursday, March 14, 2013

What's Taters, Precious?!


IMG_6284
"What's Taters, eh?"
"PO-TAY-TOES! Boil 'em, mash 'em, stick 'em in a stew..."
Haha. Sorry... Whenever I see the word "taters" I always hear poor, little Smeagol asking what they are.
I love me some mashed potatoes. And there are close to a bajillion ways to make them. Not talking proper vs improper, I’m talking all the different things you can put in them to make them different.
These today are your basic garlic variety. Nothing really fancy about them but you don’t really need anything else.
Unless you have bacon. You always need bacon.
Garlic Mashed Potatoes:
6-8 each ~ Russet Potatoes, diced large
2 tablespoons ~ Butter
¾ cup ~ Heavy Cream
1 teaspoon ~ Salt
¾ teaspoon ~ Pepper
1 teaspoon ~ Garlic Powder
1 teaspoon ~ Thyme
Notes:
  • I usually peel the skin off the potatoes when I do mashed. Sometimes I go rustic and leave them on, which mostly just saves me some time. It doesn’t really matter though when it boils down to it. (haha, get it?!)
  • When cutting the potatoes, try to cut them uniform in size. That way, when you’re cooking them, they’ll all be ready at the same time as opposed to smaller cuts being ready before bigger cuts.
  • Speaking of smaller vs. larger, I said to cut them on the bigger side. If you cut them too small then everything will be cooked to high hell and you’ll lose the few nutrients that you would’ve had otherwise. But, on the flip side, if you cut them too big, the outside will be overcooked and the inside will be undercooked. So I guess what I’m saying is cut them big, but not too big.
  • Hey, don’t get mad at me! I don’t know how big your potatoes are! Send me a picture of your potatoes before you dice them and I’ll tell you how big they need to be cut. There! Happy?!
  • I’m telling you to use heavy cream even though I don’t usually have heavy cream and just use milk. So I guess what I’m telling you here is you can use milk if you need to, but try and go with heavy cream.
POTATO MASH!
  • Peel your potatoes, dice them and put them in a pot filled with cold water. Set them on the burner and bring them to a boil.
IMG_6268
I know, I know… But why cold water? Why not just have boiling water ready and toss them in there? Why, Los... WHY?!
Well, I’m glad you asked!
If you throw them in boiling hot water they’ll immediately begin their cooking process. Your common sense may tell you there’s nothing wrong with that, but a potato is pretty dense. So by the time they've been in there long enough for the center of the potato to be done, the outside will already be breaking down from being exposed to the hot water for so long. But, if you start them off in cold water first, the potatoes will begin to cook at the same pace the water is beginning to boil. Everything cooks evenly and everyone is happy.
Am I making sense again? I hope so!
  • Once the water comes to a boil, let the potatoes cook for about 10-15 minutes. When you can stick a fork or a knife easily into one of the larger potato chunks you can find and have it easily slip right off, then they’re done. Turn off the burner.
  • Dump them in a strainer and shake off the water that’s still on them. Then go ahead and dump them back in the same pot they were just boiled in.
  • What I like to do is put the pot back on the burner then cover it almost completely with a towel. The residual heat that is still on the burner will help steam the potatoes and get rid of the moisture that is still lingering around. Let them steam for about 5 minutes.
  • In those 5 minutes, don’t twiddle your thumbs. Go ahead and take the heavy cream (or milk) and put it to heat up in a pot. You don’t want it boiling, just steaming.
Why go through the trouble? Well, the potatoes are in a cooling down phase right now. If you add a cold, thick liquid like heavy cream, your taters will get cold almost instantly, and you don’t want to work with cold taters.
  • Oh and while you’re at it, put the butter on the back of the stove where it’s nice and warm so it can get a little softened.
I’m telling you to take the butter out now because I know if I told you to take it out earlier you would not have listened to me. You never do. No one cares about letting their butter come to room temperature. You know, if I had a nickel for every time… Ugh, I digress…
Ok, potatoes are steamed and the cream is steaming.
  • Take the butter that should be semi-room temperature by now, add it to the potatoes and incorporate it before you do anything else.
Doing this will coat the starch in the pots with fat so it won’t absorb the liquid. Fat coated starches that don’t absorb liquid will help your battle against gluey mashed pots. Ha! The things you never thought you’d say.
(That tip was brought to you by Cooks Illustrated, via Bridget at The Way The Cookie Crumbles)
  • Alright, pour in half the cream and stir it in. Take a look at the consistency and add as much more cream as you think you need. I say do it this way because sometimes I add ¾ of a cup and it’s not enough, other times it’s too much. Depends on how many potatoes you used and how big they were. So this step is up to you. Don’t eff it up.
IMG_6279
No pressure.
  • Now that everything is all creamy and looking like mashed potatoes, add all your spices and seasonings and give it a good stirTaste it, and add more of what you’d like. Taste it again, and be happy because you just made mashed potatoes.
IMG_6281
Hope you enjoyed. Remember, this is just a basic mashed potato recipe. I plan on doing another post soon with different varieties of mashed taters that I enjoy, so stay tuned! 

Creamed KoRn


IMG_6303
I’m not going to lie to you. I never made creamed corn before I started making shepherd’s pie. I never had any ambition to make it. I never had it growing up. My grandmother used to make a thousand things but never once do I recall her making creamed corn. When I made it the first time, my wife had to correct me on how it was supposed to taste!
Fast forward to today and I’m still not a master creamed corn maker, but I’m alright. I’d like to give you more deep insight on where creamed corn came from, who made it, maybe some sort of crazy fun fact that would make it a million times cooler, but I don’t have anything and I don't want to lie to you. I really hope the creamed corn communities and lovers out there can find it in their hearts to forgive me for looking like I don’t care about their side of choice. Hopefully they’ll stop cursing me after they see what I have to offer.
On second though, I do have a little corn related story!
A long time ago, when my wife and I used to go to concerts regularly (by regularly, I mean like 4 or 5 a year), something we'll always remember happened...
We were in the line waiting for the doors to the KoRn show to open. The venue was the Hard Rock in Orlando, so it was in the middle of Universal City Walk where all sorts of people, mainly families, were walking from park to park. So we're in this line, more than likely wearing black along with everyone else because you know, KoRn. And this older mother and her younger son stop, tap me on the shoulder and ask me in a mild southern accent, no less:
"Excuse me, but what is this line for?"
"...It's for KoRn."
"Corn? ... *looks up and down the line full of gothic kids dressed in black, with piercings and guys with eyeliner* ... "Why are all these people in such a long line for corn?!"
                                           "Haha.. No, it's a rock band called KoRn. We're here for a concert."
"Oh... Ok." ... *walks away explaining to son that it's not corn-corn*
And there's my KoRn story for my creamed corn post. I don't know about you, but it's still funny to us!
Creamed Corn:
1 can ~ Corn Kernels
2 tablespoons ~ Butter
3 tablespoons ~ Sugar
1 teaspoon ~ Rosemary
a pinch ~ Salt
½ teaspoon ~ Pepper
2 tablespoon ~ flour
2 cups ~ Milk
Notes:
  • You can use canned, frozen or even fresh corn if you like. Whatever you have, whatever’s easier.
  • Like I said, I don’t know creamed corn. So I don’t know if putting rosemary in it is some sort of slap in the face to creamed corn purists. If so, my bad.
  • I’d rather use heavy cream but all I had was milk. If you have heavy cream, omit the flour and just let it reduce on it’s own to get thick.
Let’s get to creamin’:
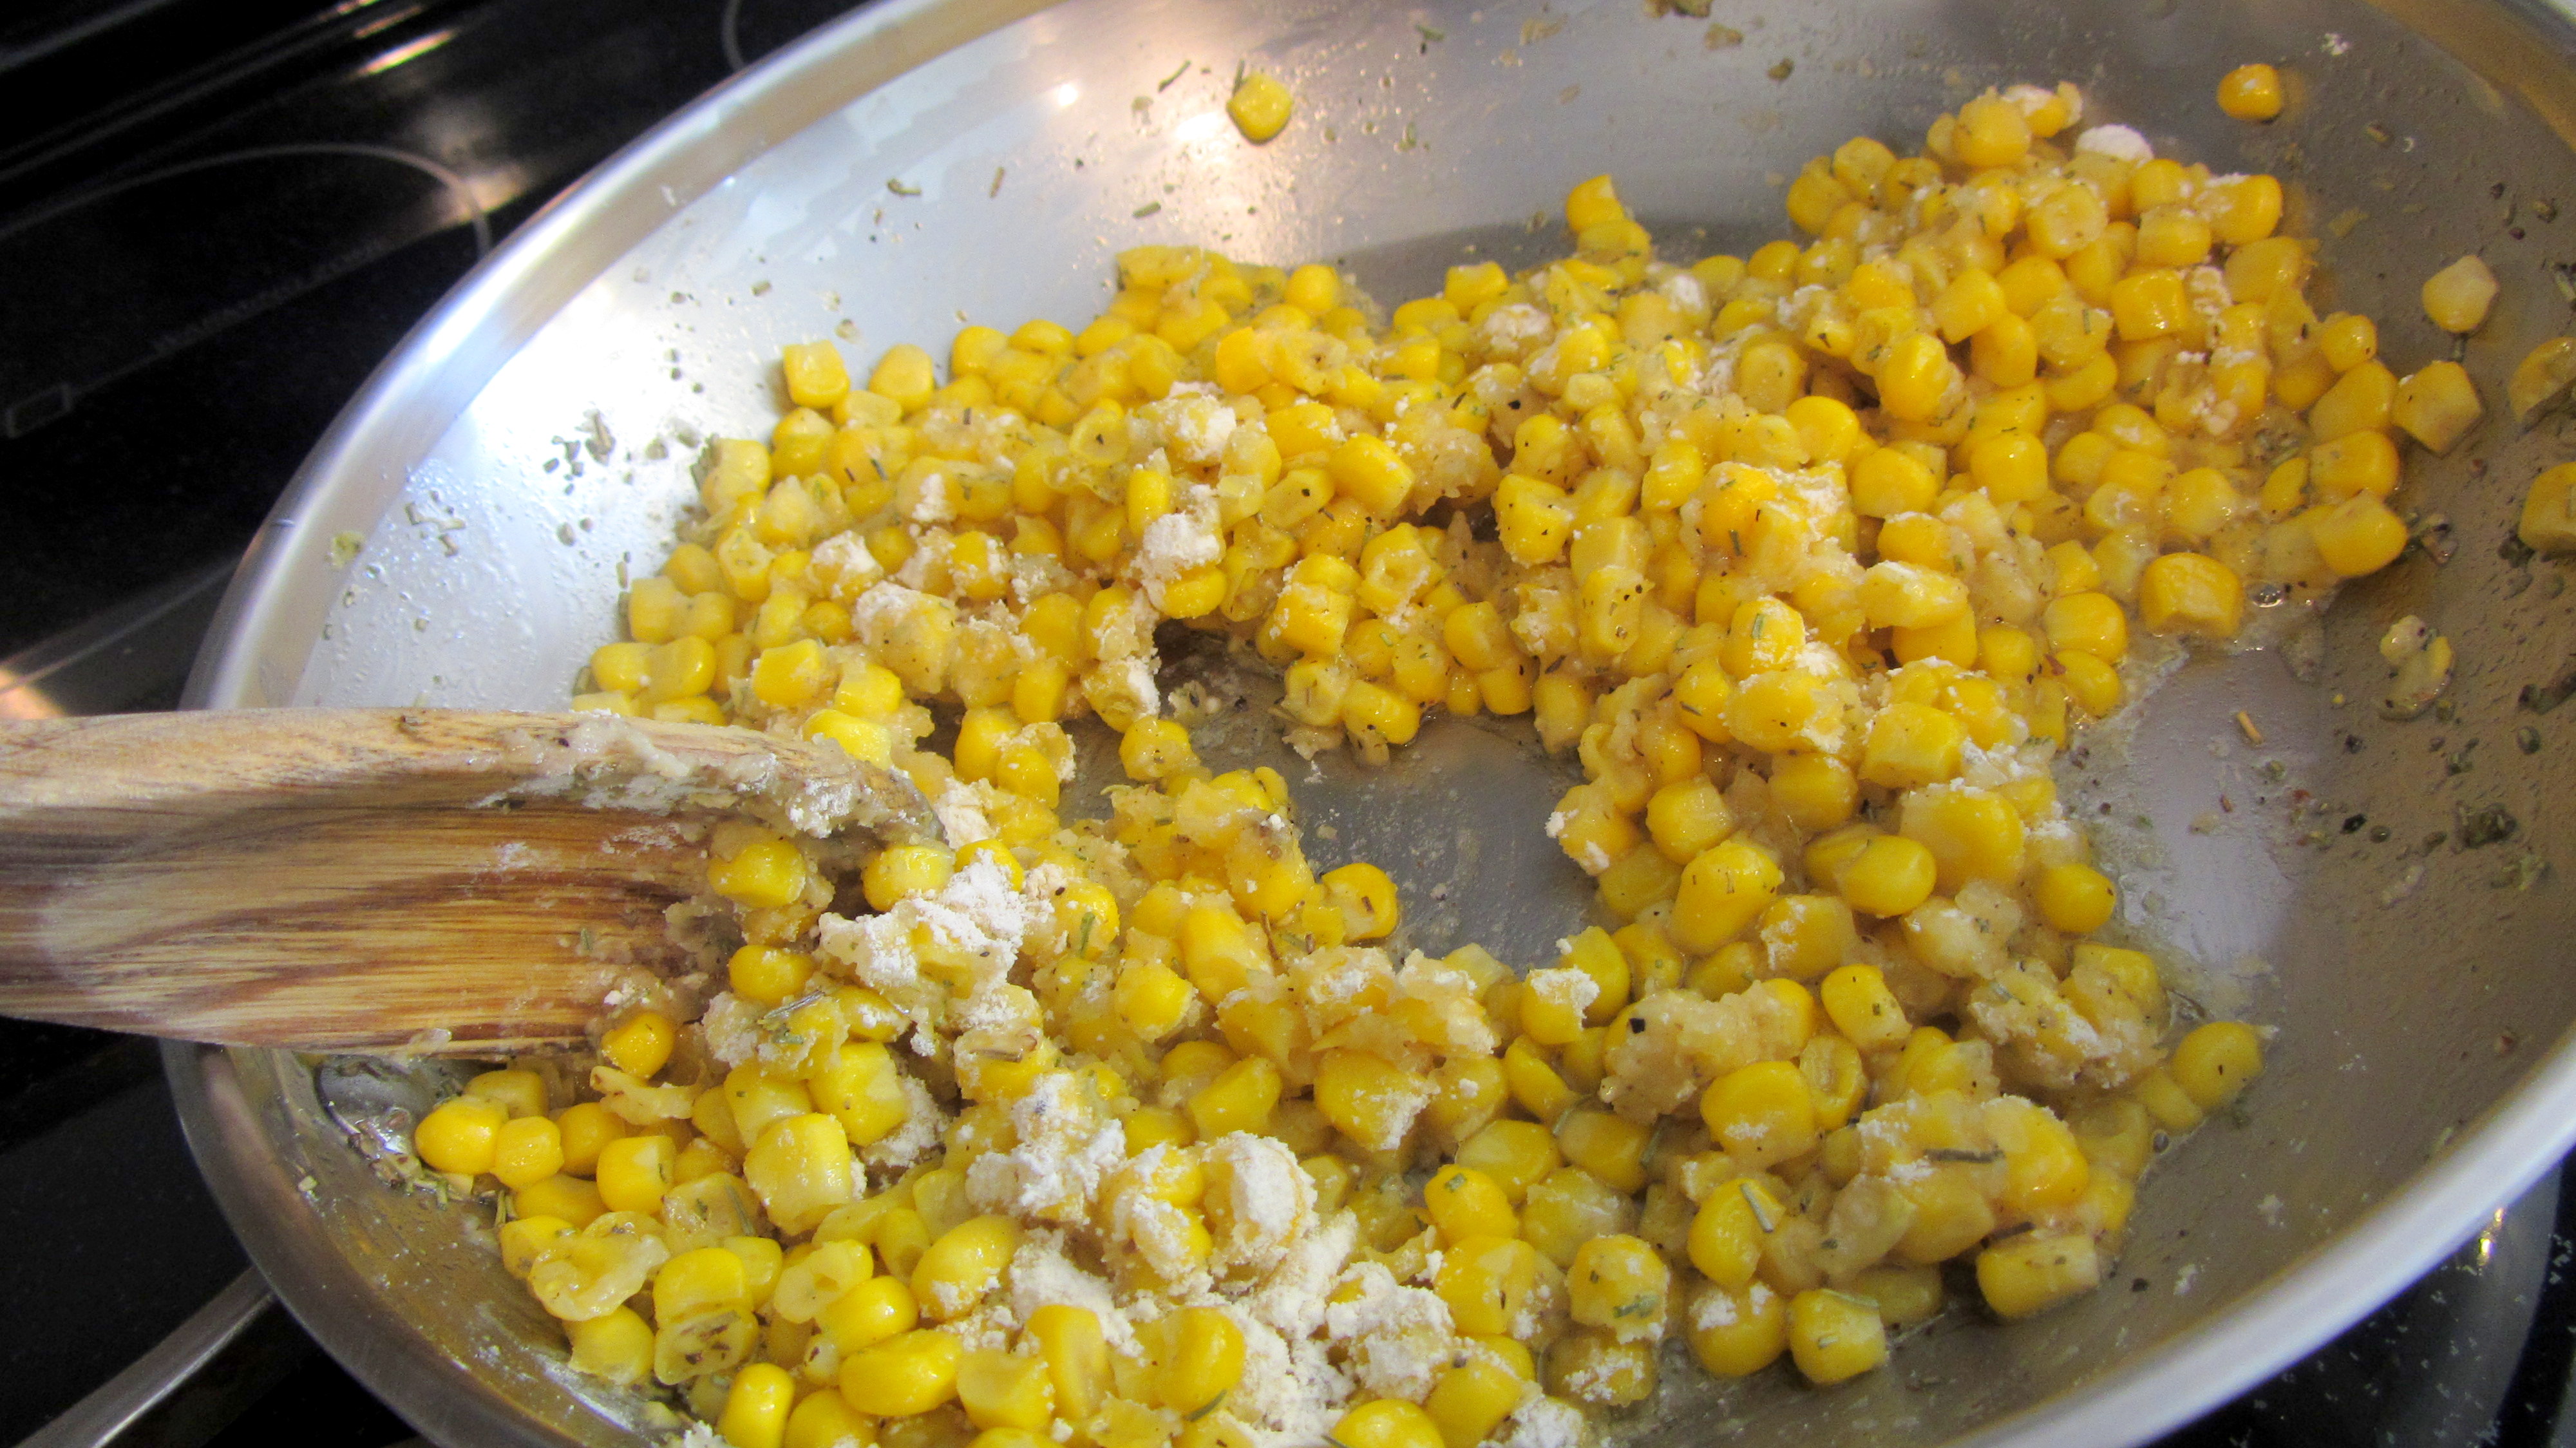
  • To make it easy, just put the corn, butter, sugar, rosemary, salt and pepper in a pan and turn it on medium heat.
IMG_6289
  • About a minute or two after the butter melts, add the flour to make the roux. Let it cook about another minute or two.
IMG_6290IMG_6292
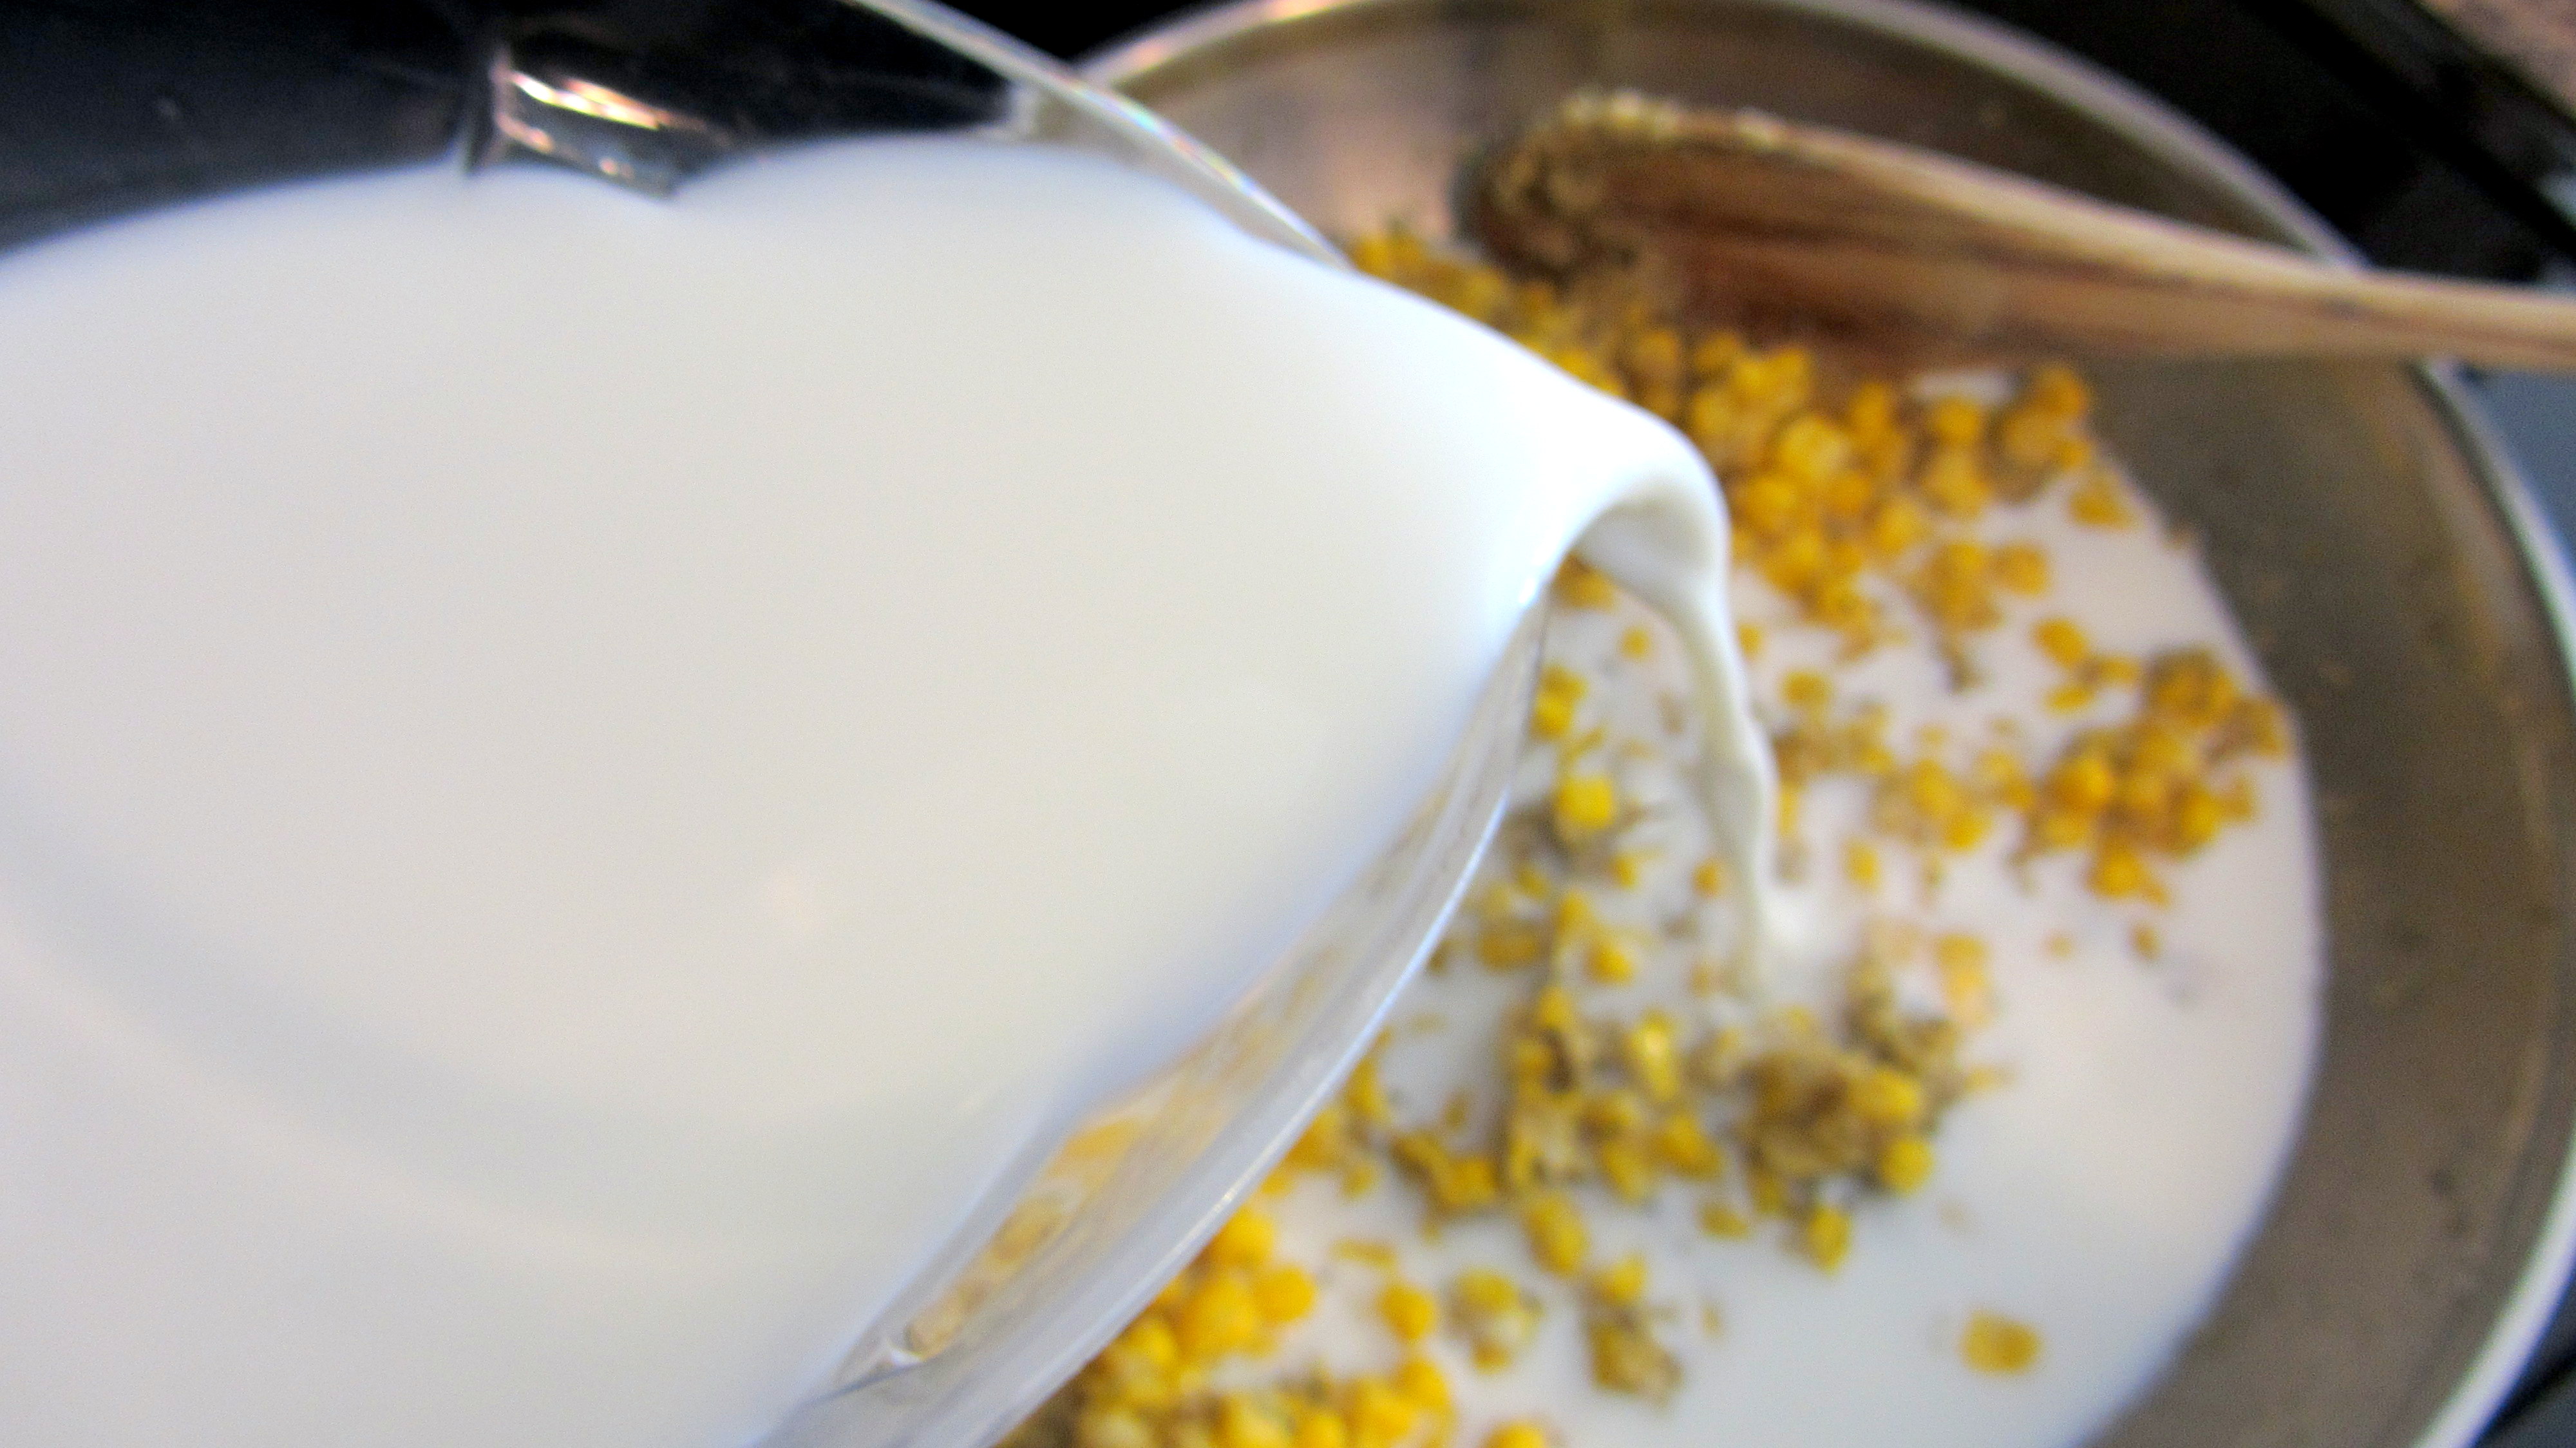
  • Add the milk and stir or whisk until you feel like the roux has been incorporated. At this point, if you have the time you can sit there and constantly stir for about 20 minutes or you can be impatient like I was and turn up the heat a bit and constantly stir for about 10 minutes.
IMG_6294
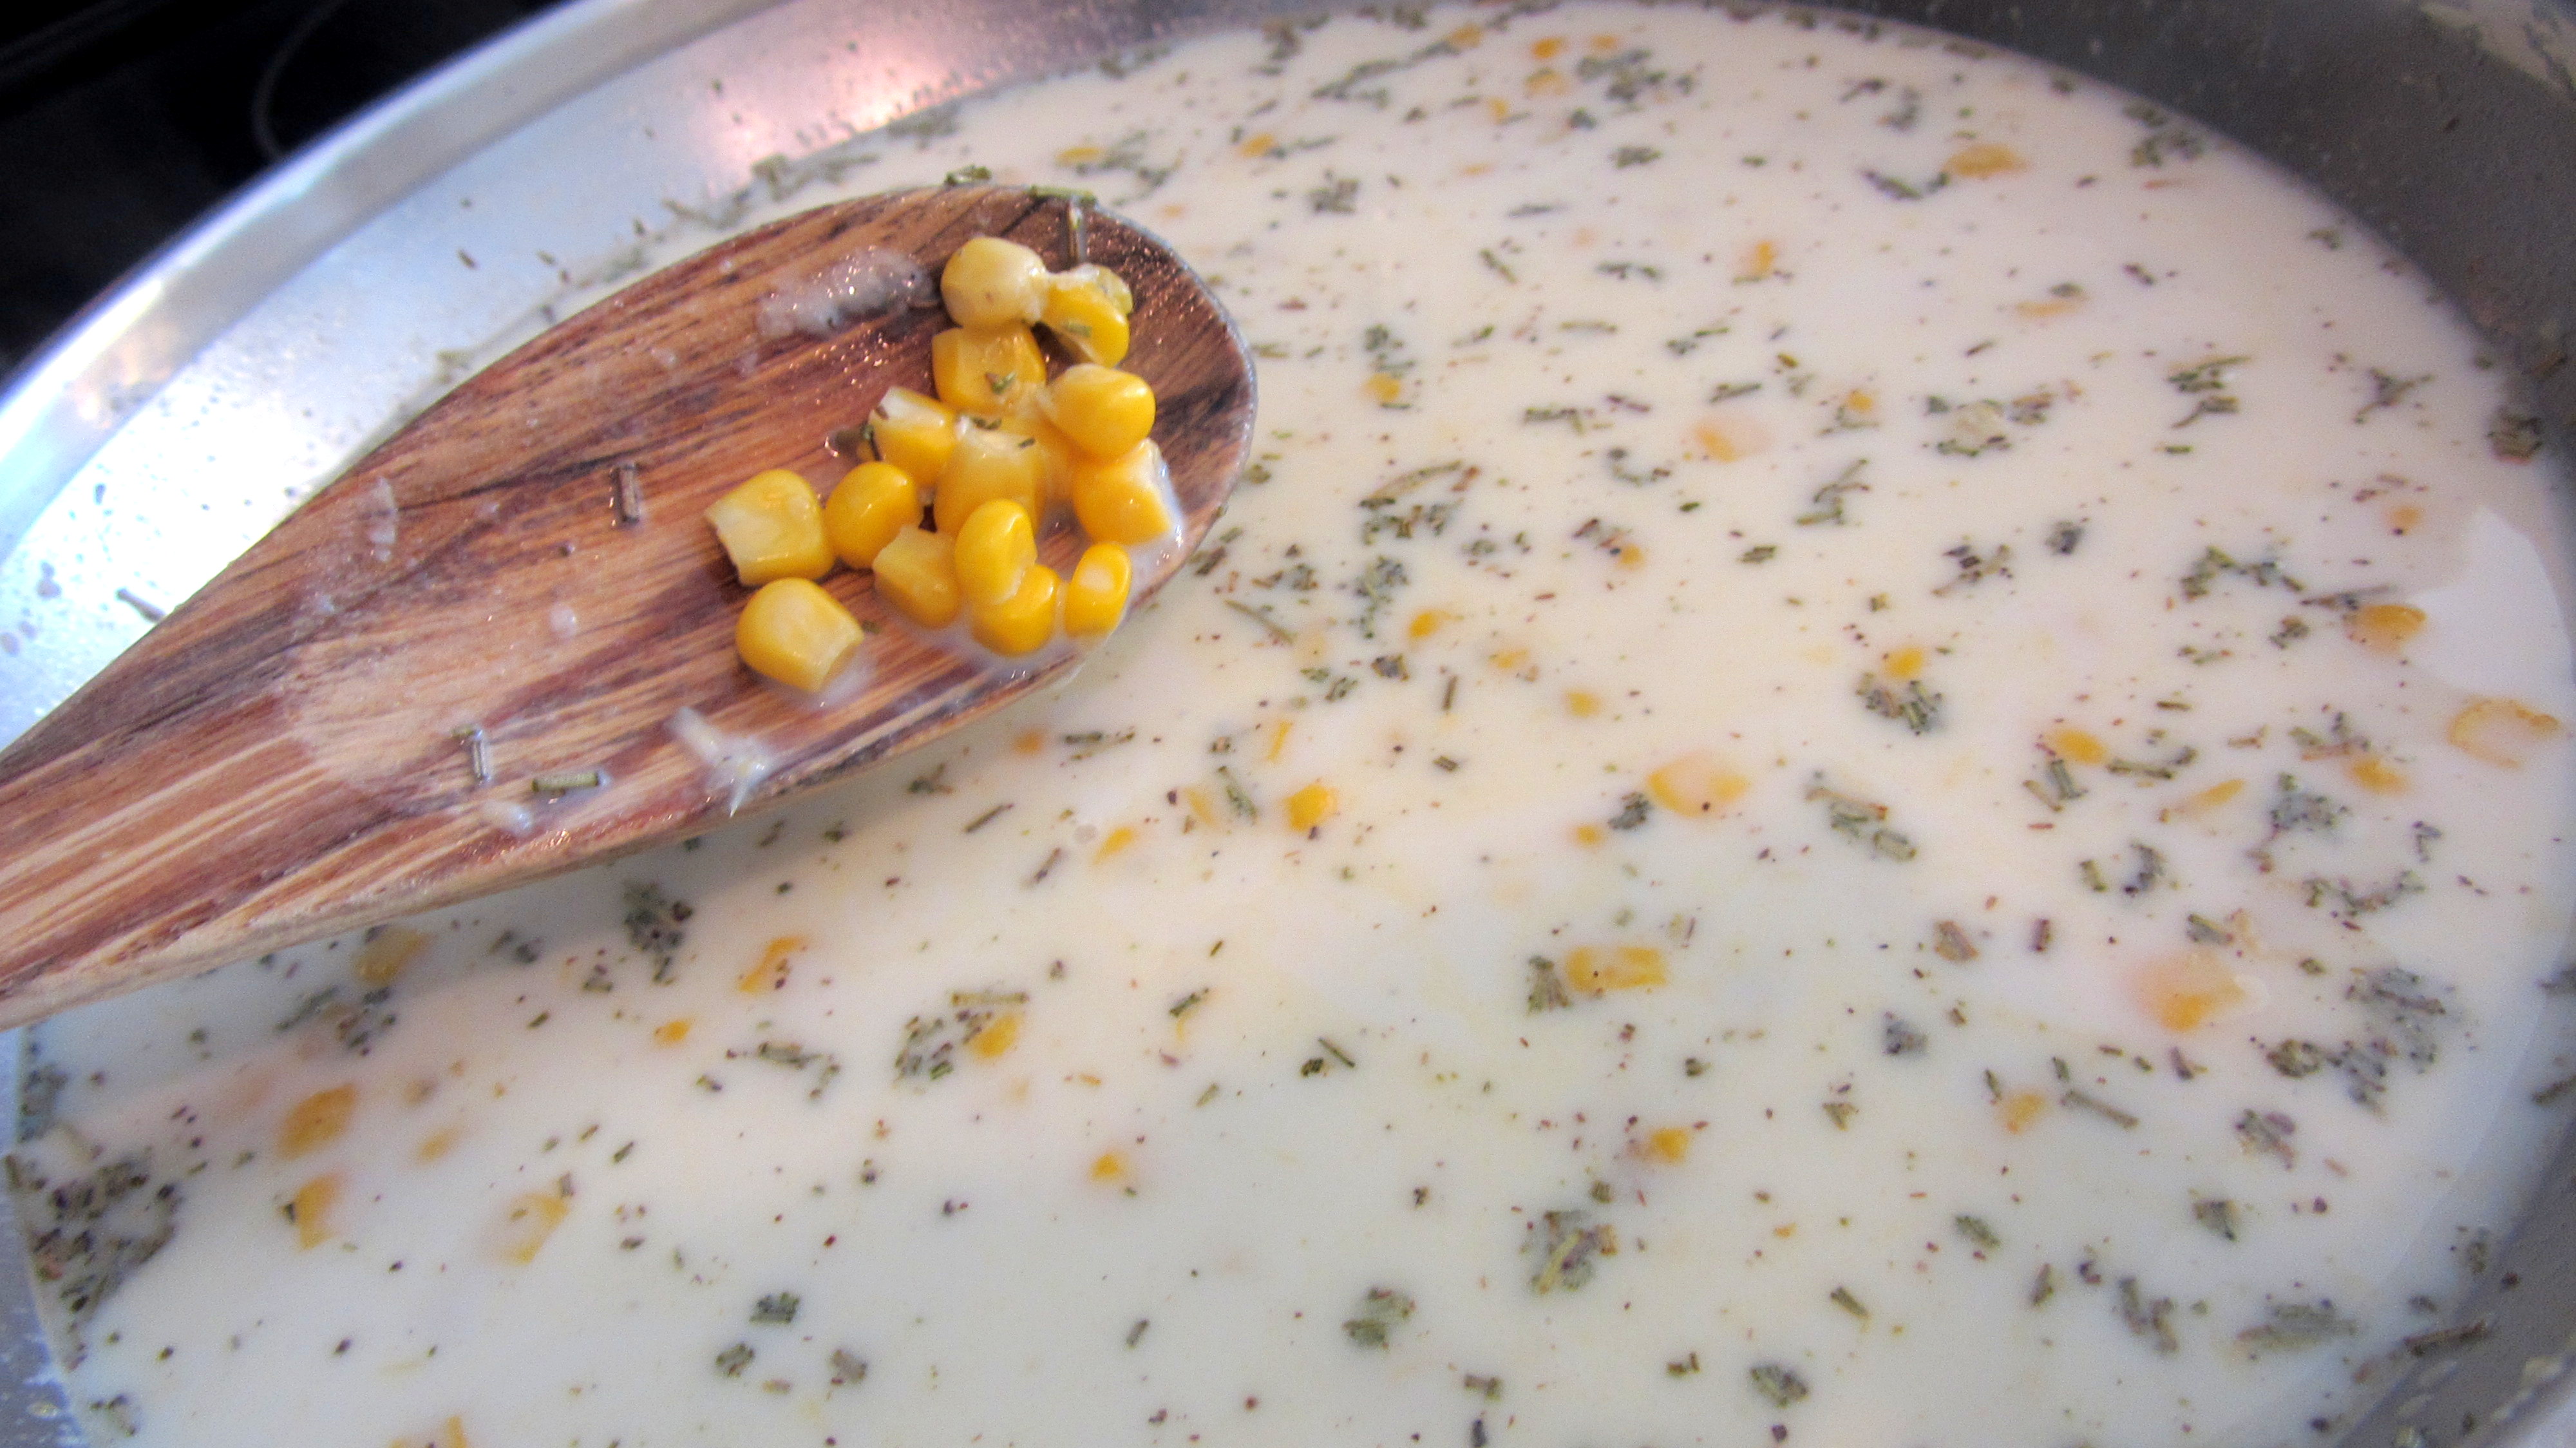
When you’re using a roux, whatever you’re trying to thicken won’t be fully thickened until it’s been simmering for a good 10-20 minutes. You need time for all the flour to absorb the liquid and create a creamy product.
IMG_6296
  • So after 10 minutes of stirring almost constantly, it should be as thick as it’s going to get. Give it a taste and fix whatever seasonings you want to fix. Little more pepper, maybe some more sugar, it’s up to you.
IMG_6300
And that’s that. Creamed corn. It sounds like I’m downplaying it, but when I make it I always tell myself I have to make it more often. It’s creamy, tasty, and easy. Hope you like!

Thursday, October 18, 2012

Déjà Garlic Bread

I would like to take this time to apologize.

Why am I apologizing? Well, one, because I feel like I'm neglecting all 9 of you who regularly check out my blog. I've been crazy busy with moving and I'm missing out on primo fall-time recipe opportunities. So for that, I'm deeply sorry.

And two, because I’m posting about Garlic Bread again.

I know, I know. All I've been posting about lately is garlic and bread, and I really do feel terrible about it. To think that I’m making you sit there and look at all these posts talking about the same thing over and over again, I feel like a monster. Like I’m holding you against your will and just blatantly abusing your eyes with the same crap while trying to make it better by putting it in a different toilet. I know, it’s too much garlic, right? You agree? Is it too much garlic?


No! The answer is NO!


Geeze, are you kidding me?! There is no such thing as too much garlic! And you know what, if I were to post about garlic for a month straight, I really don’t think you’d have any objections, would you? Yeeeeeeeeah, that’s what I thought. And don’t think I didn't see you there agreeing with what I was just saying, I know who you are and you should be ashamed of yourself.

“…Same crap, different toilet...”

How dare you say that about garlic bread!


Garlic Bread Part II:


                       1 each ~ Baguette Loaf
            4 tablespoons ~ Garlic Oil
                1 teaspoon ~ Dried Oregano
                1 teaspoon ~ Dried Thyme
            2 tablespoons ~ Grated Parmesan
          generous pinch ~ Salt & Pepper


Notes:


  • If for some reason you don’t know how to make garlic oil, allow me to guide you to my last post, The Garlic of the Gods. When you are done with that simple, 45 minute task, you will have enough garlic oil for this and then some.
  • If it’s too tedious to put garlic and oil in an oven for 45 minutes, I understand. Replace the garlic oil with regular extra virgin olive oil, and add either 2 tablespoons of chopped garlic, or 1 tablespoon of garlic powder and add it as you would add the dried herbs. Just remember, the garlic oil is what’s going to give it a better, deeper flavor.
  • I used to use butter in this recipe instead of oil. But the oil doesn't take anything away from it and you feel a little better after you've had your 5th or 6th piece.
  • You can really play this recipe by ear. If you don't like oregano, replace it with something you do like. If you love it, add more. If you want the bread to have a little kick, add red pepper flakes, etc. Consider this, like many other recipes I give you, as more of a guideline.


Alright, to get the ball rolling:


  • Set the oven to 350. Cut your baguette in half lengthwise as if you were making a huge sandwich. You don't have to use the whole loaf if it'll be too much, so don't feel like you have to make the whole thing. I know baguettes are fairly long.


  • Now take the garlic oil and give it a nice drizzle on the bread. Don't put too much though or you'll have an oily, greasy mess that no one would want to take a second bite into. Next, depending on how salty your oil is, add the salt and pepper, and then the herbs, then the cheese. You want to sprinkle everything evenly around so it's all covered. You can grate some fresh Parmesan on there instead of the already grated stuff you buy, either way you will win.


  • After everything is partying together on the bready dance floor, pop it in the oven for 8-12 minutes. Check it at 8, and if by 10 or 11 it's not browning yet, go ahead and turn on the broiler for about 2 minutes. But watch it! The broiler is your best friend for the minute or two you need it, but if you forget about it, you're going to be cursing it out for the rest of the night.


I don't need to tell you what you're looking for. Once you see the bread bubbling and the top and edges crisping up to a nice, golden brown, you'll know that your job is done and that whoever you're making this for will fall madly in love with you.

Because that, my friends, is the power of Garlic.

Saturday, September 22, 2012

The Garlic of the Gods


I’ve been in this garlicy, bready kind of mood lately, have you noticed?

Nah, I bet you didn’t. But if you did, you’re probably wondering what I have up my sleeve next.

Go ahead, guess..


(If you guessed bread, I’ll give you another chance to guess garlic….)


Yes! Garlic! Good guess.

There has to be hundreds of things you can do with garlic, but today I’m just focusing on roasting it. If you’ve never roasted garlic before, first of all - it's easy, second - what is the matter with you?! You have no idea what you’re missing. Might as well be living under a rock! I have half a mind to go all Forrest Gump on you and start listing everything you can do with roasted garlic, but I can’t do that because I’ll run out of bandwidth!


Roasted Garlic:


                         1 cup ~ Garlic Cloves, peeled
                        ¼ cup ~ Extra Virgin Olive Oil
               good pinch ~ Salt and Pepper


Notes:


  • There are a few ways this can be done. Wrapping with aluminum foil, roasting an entire head of garlic, etc… But here, I’m working with already peeled garlic cloves. It doesn’t matter how it’s done because in the end, roasted garlic is roasted garlic.
  • If you don’t have an oven safe dish or anything else to use for it, you can use some trustworthy aluminum foil. By trustworthy, I mean some that isn’t flimsy and tears easily. And just close up the garlic and oil in the foil and seal it good, then put it on a sheet tray in the oven in case any mess occurs.
  • The amount of Olive Oil you use will depend on what you're putting it in. You want enough oil so that the garlic is for the most part submerged. Which is why I would recommend a smaller dish to prepare this in. 
  • If you want to roast more garlic then by all means, go nuts! If it takes longer than the time this takes just keep an eye on it until the garlic is brown.


This recipe is so easy, my brain is hurting from trying to figure out a clever fashion in which to begin to describe the ways that this is, in fact, the easiest recipe to successfully attempt in your kitchen:


  • Preheat your oven to 350°. If you’d like, and what you’re using fits, you can go ahead and use your toaster oven if you want. That’s how I did mine here.


  • Find a small dish that can go in the oven, even a sauté or sauce pan will do. If you don’t have anything small, use foil like I said in the notes. Put the garlic cloves in your dish and then pour in the oil and season with salt and pepper. Then cover tightly with aluminum foil and put it in the oven for 40-45 minutes. After about 40 minutes, check it. If the garlic is a bit brown and can be easily mashed then it’s done.


You can take the garlic out of the oil and do a number of things with it from mashing it and putting it in mashed potatoes or a spaghetti sauce, or even just eating it straight up like what happened to that poor clove on my fork.

When you roast garlic, it becomes sweet and very smooth, so eating it straight up will do nothing but make you want to eat the rest of them straight up.

You can also put it in room temperature butter and then freeze it to make a compound butter that would be perfect for steaks or vegetables or rubbing on your body. Or you can just put it straight on some crusty bread and be the happiest person on the block. The possibilities with roasted garlic are endless.


But the fun doesn’t stop at the garlic. See that oil you roasted it in? That is now garlic oil! Infused with all the flavor of the garlic, that oil went from great to downright amazing. Keep it in the fridge for a few days if you need to, never at room temperature, but it probably won’t last. It’s perfect to make garlic bread, vinaigrettes, or to just use for dipping.


Be careful keeping it though, if you scroll towards the end of this page you’ll see garlic and oil are not great bedfellows when it comes to storing.


And that’s that. Roasted garlic. Get to it, make it, and start your life anew.


Friday, August 3, 2012

Garlic + Bread = Love


Have you ever had a giant bowl of pasta, then afterwards still feel a little empty inside? Like something was missing and you just couldn’t figure out what? Well I’ll tell you what was missing…

Garlic Bread.

If you’re having pasta, no matter how much of it you have in front of you, there should always be a plate of garlic bread near by. Matter of fact, I’m sure that’s written in stone somewhere.

And I’m not talking about Olive Garden garlic breadsticks here. I’m talking…

Oh no.. Don’t you sit there and act like you never went to Olive Garden and had their breadsticks. Everyone has. Heck, it’s all people eat there, it’s a proven statistic. A sad one, but it was documented.

But I’m not here to talk about Olive Garden or how fake and terrible they are. I’ll save all that rage for another post.No, let’s get back to the matter at hand. Garlic bread. Real garlic bread. You know, with actual garlic.

I know I say it in every post, but I can’t stress the simplicity of this. If you are that person who buys the loaves of frozen garlic bread in the store, then you really need to just stop. Seriously, don’t buy anymore, those are disgraceful. Pulling that out of the freezer, into the oven and calling it garlic bread is like saying you’re going out for an authentic Italian dinner, and then driving to the Olive Garden.

Damn Olive Garden, just keeps on coming back up. (zing!):


Garlic Bread:


                    1 each ~ Baguette or other long crusty bread
       1 stick (½ cup) ~ unsalted Butter
     1 ½ tablespoons ~ Fresh Garlic, chopped
         2 tablespoons ~ Cilantro, chopped
                 To Taste ~ Salt and Pepper


Notes:

  • I have a few recipes for garlic bread. This is the more “party friendly” one since it’s more presentable and personal. I'll do another one soon.
  • If you don’t like Cilantro for some absurd reason, you can very easily substitute it for plain ol’ parsley.
  • The salt you add can make this “ok” or it can make it “addicting”. So keep that in mind when seasoning.
  • When cutting the bread, if you want crispier bread, cut it thin. I've cut it as thin as a quarter of an inch. This is the size that is optimal for a party platter or for general company since it’s easy to consume and doesn't feel like a lot at once. If you want a more hearty, chewy bread then cut it thicker, about 3/4 of an inch to an inch. This is good for dinner time where one piece can soak up some sauce and last you a bit.


Alright, fun time:

  • First things first, turn on the oven to 350°. Then chop the garlic and cilantro. I chop them both a bit rough since I don’t mind biting into a bigger piece of each. Once chopped, put the butter, garlic and cilantro in a pan and turn the heat on low.


  • While it’s melting, cut the bread at a bias. 


If you don’t know what a bias cut is, check out this informative video that’s probably going to make you scratch your head at the simpleness it teaches. Bias means to cut at an angle, and it’s mostly for presentational purposes. You won’t be using the ends, but keep them for tasting the mixture.


Thinner

Thicker


  • When you’re done cutting the bread thin or thick depending on your preference, the butter should be melted. Add a bit of salt and pepper to the butter, stir, then dip one of the ends in and taste it. What you taste is what the end product will be like, so if you need more of salt and pepper, you’ll know here instead of at the dinner table.


  • When it’s to your liking, line a sheet tray with aluminum foil then spoon some of the butter mixture onto the tray and spread it around with the back of the spoon or brush until the entire tray is covered.


  • Place the bread on the tray while giving it a little swirl to get some butter underneath. When you have all the bread on the tray, get a pastry brush and brush the butter mixture on top of the bread. Put enough for a nice coating but don’t pour it on or you’ll have a soggy, greasy bread. If you don’t have a brush, just use a spoon, a fork, your fingers, seriously, who the hell cares?


  • Now depending on the thickness of how you cut the bread, you’ll want to check how long you put it in the oven for. If the bread is thin, you’ll want to check it in about 8 – 10 minutes. If it’s thick, it can probably go 12 – 14 minutes


Whichever you did, don't walk away and forget about them. They're going to be done when the edges are slightly golden. If you want them more golden and crispy, then by all means, you won't hurt my feelings.

Enjoy, and don't forget to save some for everyone else.

Tuesday, March 20, 2012

Buckle Up.. It's the Slaw


_____________________________

Welcome to the Church of the Holy Cabbage. Lettuce pray..

                                                    ~ Unknown

_____________________________


Hello to the first day of Spring!!

Aside from a few of those in the North, it's been a rather mild Winter for most of us. But as of today it is officially behind us and a season full of new beginnings is set and ready to bloom. So what better way to ring in Spring than with an easy recipe for a tangy, refreshing side that is full of fresh flavors? Alright, there may be a few better ways, but not many!

In the middle of Orlando, located on Universal Studios property, I used to work at a huge Hawaiian themed hotel, which, out of respect, shall remain nameless. This post isn’t about the nightmare of working there, so don’t grab your popcorn just yet. No, this is about one of the few recipes that stuck with me since abruptly leaving in a fit of rage with my middle finger raised high quitting there many years ago. Just thinking back to those times makes me want to shut off the lights and rock back and forth in a corner, so excuse me if I don't dwell and share an extensive back story about this one.

I’m not sure of the origins of this recipe. I don’t know who first created it, or if it’s even something that is traditionally made in the region it claims to be from. I do know that it is rather tasty, borderline healthy, and goes great in wraps:


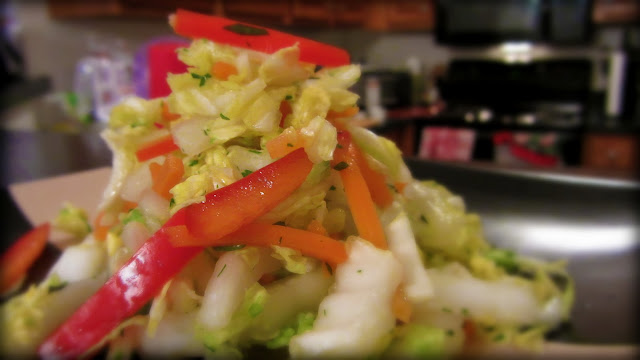
Asian Slaw:

  1 head ~ Nappa Cabbage, shredded
      1 ea ~ Red Bell Pepper, julienned
    1 cup ~ Carrots, shredded
   ¼ cup ~ Cilantro and/or Mint, chopped
   2 cups ~ Apple Cider Vinegar
    ½ cup ~ Sugar                                                                                                                     To Taste ~ Salt & Pepper


See? Easy peasy Japanesey! If you do a search for Asian Slaw you will find a bunch of recipes with ingredient lists longer than your arm, consisting of just about every Asian-esque ingredient known to man: Soy sauce, sesame oil, bok choy, bean sprouts, ginger… I’m sure it all tastes great and contribute nicely to the slaw, but it’s a side dish. And I’m not going to be buying all these things I don’t normally have on hand for just a side dish. Out of your freaking mind…

No, this is totally easy and consists of things you could use for everyday cooking, so I wouldn’t be surprised if you have most of it on hand already. It may not be an "official" Asian Slaw, but who the hell cares? Well, besides The Food Police, but nobody really likes them anyway. The original recipe called for mint, which is one of those herbs I love but won’t get much use out of it if I buy a bunch. So if you want to spring for it or have it already, use it, it adds a whole other level of freshness to the slaw. I replaced it with cilantro because it’s easier and way cheaper to buy. If you want both, do both! Also on the original recipe was fish sauce, but even when I was making this at the hotel I skipped the fish sauce. Some things just should have never been invented.

If you've never heard of or seen Nappa Cabbage, you can find it in most produce departments, and it looks like this:


It's crisp and great for making slaw. You'll also get a lot of product out of one head. 


  • First you’ll want to find a container big enough that you will be able to comfortably toss the slaw. Now get a mixing bowl and pour in the Apple Cider Vinegar and the Sugar. If you've never worked with Apple Cider Vinegar before, I would not encourage your curiosity to take a sip. It’s a little strong for my taste, although, if you do, let me know how it turns out. Whisk the Vinegar and Sugar together and set the bowl aside. Then slice your Nappa Cabbage in half length wise (like pictured above), and clean it! Run cold water over it and make sure you get it in there, you don’t want any legged or winged surprises. 


  • Once it’s clean set it flat on your board and cut it in half length wise again, then start chopping it from the top. You’re looking for a nice small thickness to the shreds, not something super thin. Think coleslaw. Once the entire cabbage is shredded, cut the Red Pepper julienne (thin strips) to match the cabbage. Once the pepper is sliced, you can open up your bag of shredded carrots and throw a cup (or same amount as the pepper) into the bowl. …What? You think I’m going to waste time shredding a carrot? Do you know me?? Next, chop up your Cilantro and/or Mint and throw it in with everything else.


  • Now wash your hands because you’re about to get dirty. Get the dressing, and whisk it once more to make sure all the sugar is incorporated, and just pour it into the slaw. Roll up your sleeves and start mixing, toss the slaw well and make sure everything is properly distributed and is evenly dressed. Once it’s all mixed, give it a taste


If you feel it is way too tangy you can add more sugar, as well as salt and pepper to taste, but you have to make sure you toss it really well again so what you just added can get into the dressing. Once you’re comfortable and happy with it, wrap it up and put it in the fridge. It’s nice and fresh now and totally fine to enjoy, but it’s going to be able to blend and get a lot more happier overnight. It’s also going to shrink down once it starts soaking up the liquid. So the next morning you can probably transfer it into something smaller.

Notice how much it shrunk down in just a few hours.

I absolutely love this in a grilled chicken wrap, or even fish or shrimp. You can also go nuts and throw it on a sandwich. What you do with it is your business.


And that’s it! As I said, I’m not totally sure if this Asian Slaw is even Asian, but it is yum and not to mention a perfect way to welcome Spring in to your kitchen!