Showing posts with label Bread. Show all posts

Thursday, October 18, 2012

Déjà Garlic Bread

I would like to take this time to apologize.

Why am I apologizing? Well, one, because I feel like I'm neglecting all 9 of you who regularly check out my blog. I've been crazy busy with moving and I'm missing out on primo fall-time recipe opportunities. So for that, I'm deeply sorry.

And two, because I’m posting about Garlic Bread again.

I know, I know. All I've been posting about lately is garlic and bread, and I really do feel terrible about it. To think that I’m making you sit there and look at all these posts talking about the same thing over and over again, I feel like a monster. Like I’m holding you against your will and just blatantly abusing your eyes with the same crap while trying to make it better by putting it in a different toilet. I know, it’s too much garlic, right? You agree? Is it too much garlic?


No! The answer is NO!


Geeze, are you kidding me?! There is no such thing as too much garlic! And you know what, if I were to post about garlic for a month straight, I really don’t think you’d have any objections, would you? Yeeeeeeeeah, that’s what I thought. And don’t think I didn't see you there agreeing with what I was just saying, I know who you are and you should be ashamed of yourself.

“…Same crap, different toilet...”

How dare you say that about garlic bread!


Garlic Bread Part II:


                       1 each ~ Baguette Loaf
            4 tablespoons ~ Garlic Oil
                1 teaspoon ~ Dried Oregano
                1 teaspoon ~ Dried Thyme
            2 tablespoons ~ Grated Parmesan
          generous pinch ~ Salt & Pepper


Notes:


  • If for some reason you don’t know how to make garlic oil, allow me to guide you to my last post, The Garlic of the Gods. When you are done with that simple, 45 minute task, you will have enough garlic oil for this and then some.
  • If it’s too tedious to put garlic and oil in an oven for 45 minutes, I understand. Replace the garlic oil with regular extra virgin olive oil, and add either 2 tablespoons of chopped garlic, or 1 tablespoon of garlic powder and add it as you would add the dried herbs. Just remember, the garlic oil is what’s going to give it a better, deeper flavor.
  • I used to use butter in this recipe instead of oil. But the oil doesn't take anything away from it and you feel a little better after you've had your 5th or 6th piece.
  • You can really play this recipe by ear. If you don't like oregano, replace it with something you do like. If you love it, add more. If you want the bread to have a little kick, add red pepper flakes, etc. Consider this, like many other recipes I give you, as more of a guideline.


Alright, to get the ball rolling:


  • Set the oven to 350. Cut your baguette in half lengthwise as if you were making a huge sandwich. You don't have to use the whole loaf if it'll be too much, so don't feel like you have to make the whole thing. I know baguettes are fairly long.


  • Now take the garlic oil and give it a nice drizzle on the bread. Don't put too much though or you'll have an oily, greasy mess that no one would want to take a second bite into. Next, depending on how salty your oil is, add the salt and pepper, and then the herbs, then the cheese. You want to sprinkle everything evenly around so it's all covered. You can grate some fresh Parmesan on there instead of the already grated stuff you buy, either way you will win.


  • After everything is partying together on the bready dance floor, pop it in the oven for 8-12 minutes. Check it at 8, and if by 10 or 11 it's not browning yet, go ahead and turn on the broiler for about 2 minutes. But watch it! The broiler is your best friend for the minute or two you need it, but if you forget about it, you're going to be cursing it out for the rest of the night.


I don't need to tell you what you're looking for. Once you see the bread bubbling and the top and edges crisping up to a nice, golden brown, you'll know that your job is done and that whoever you're making this for will fall madly in love with you.

Because that, my friends, is the power of Garlic.

Saturday, September 22, 2012

The Garlic of the Gods


I’ve been in this garlicy, bready kind of mood lately, have you noticed?

Nah, I bet you didn’t. But if you did, you’re probably wondering what I have up my sleeve next.

Go ahead, guess..


(If you guessed bread, I’ll give you another chance to guess garlic….)


Yes! Garlic! Good guess.

There has to be hundreds of things you can do with garlic, but today I’m just focusing on roasting it. If you’ve never roasted garlic before, first of all - it's easy, second - what is the matter with you?! You have no idea what you’re missing. Might as well be living under a rock! I have half a mind to go all Forrest Gump on you and start listing everything you can do with roasted garlic, but I can’t do that because I’ll run out of bandwidth!


Roasted Garlic:


                         1 cup ~ Garlic Cloves, peeled
                        ¼ cup ~ Extra Virgin Olive Oil
               good pinch ~ Salt and Pepper


Notes:


  • There are a few ways this can be done. Wrapping with aluminum foil, roasting an entire head of garlic, etc… But here, I’m working with already peeled garlic cloves. It doesn’t matter how it’s done because in the end, roasted garlic is roasted garlic.
  • If you don’t have an oven safe dish or anything else to use for it, you can use some trustworthy aluminum foil. By trustworthy, I mean some that isn’t flimsy and tears easily. And just close up the garlic and oil in the foil and seal it good, then put it on a sheet tray in the oven in case any mess occurs.
  • The amount of Olive Oil you use will depend on what you're putting it in. You want enough oil so that the garlic is for the most part submerged. Which is why I would recommend a smaller dish to prepare this in. 
  • If you want to roast more garlic then by all means, go nuts! If it takes longer than the time this takes just keep an eye on it until the garlic is brown.


This recipe is so easy, my brain is hurting from trying to figure out a clever fashion in which to begin to describe the ways that this is, in fact, the easiest recipe to successfully attempt in your kitchen:


  • Preheat your oven to 350°. If you’d like, and what you’re using fits, you can go ahead and use your toaster oven if you want. That’s how I did mine here.


  • Find a small dish that can go in the oven, even a sauté or sauce pan will do. If you don’t have anything small, use foil like I said in the notes. Put the garlic cloves in your dish and then pour in the oil and season with salt and pepper. Then cover tightly with aluminum foil and put it in the oven for 40-45 minutes. After about 40 minutes, check it. If the garlic is a bit brown and can be easily mashed then it’s done.


You can take the garlic out of the oil and do a number of things with it from mashing it and putting it in mashed potatoes or a spaghetti sauce, or even just eating it straight up like what happened to that poor clove on my fork.

When you roast garlic, it becomes sweet and very smooth, so eating it straight up will do nothing but make you want to eat the rest of them straight up.

You can also put it in room temperature butter and then freeze it to make a compound butter that would be perfect for steaks or vegetables or rubbing on your body. Or you can just put it straight on some crusty bread and be the happiest person on the block. The possibilities with roasted garlic are endless.


But the fun doesn’t stop at the garlic. See that oil you roasted it in? That is now garlic oil! Infused with all the flavor of the garlic, that oil went from great to downright amazing. Keep it in the fridge for a few days if you need to, never at room temperature, but it probably won’t last. It’s perfect to make garlic bread, vinaigrettes, or to just use for dipping.


Be careful keeping it though, if you scroll towards the end of this page you’ll see garlic and oil are not great bedfellows when it comes to storing.


And that’s that. Roasted garlic. Get to it, make it, and start your life anew.


Friday, August 10, 2012

What the Focaccia?!


Being someone who has worked in the kitchen, you know what's right and what's wrong. You know where someone in the back is cutting corners, and you know why. You can tell when something is done on purpose, like strategically placing burnt, overdone potatoes underneath fresh ones, hoping no one would notice. When it comes to problems like that it's amazing how often "on purpose" coincides with "half assed". You can also tell when something is done out of pure ignorance, like when you order a Caesar salad and the lettuce is wet prior to tossing, making the dressing watery and diluted. Or if it comes out with half of the leaves black and nasty, forcing you to pick through it and leaving most of it on the plate. Or...

When you get like 2 croutons.

TWO.

Ok, I digress. I'm not here to complain about restaurants and everything they do from charging you 3 times more than what the meal actually costs or sticking you with a pissed off waitress whose manager is an assclown because he won't comp her food even though she's working a 10 hour shift with no break and has 15 tables. 

No, I'm here to talk about Focaccia.

O0o0o.. Did you feel that? ...Say it again...

Focaccia..

I'll explain how Focaccia ties into all of this in just a bit, but for now, let me put it like this: Bread is bread, but Focaccia is Focaccia. Capiche?

One of the simplest, most joyous pleasures in life is a crusty, hot, freshly baked bread, and some extra virgin olive oil seasoned with fresh ground pepper and a sprinkle of sea salt. The amount of time I can live off of that is unhealthy. So it’s really no wonder why Focaccia is one of my favorite things ever. It’s everything I love in one bite.

In case you're lost and don’t know what it is, it’s basically an Italian flatbread. Usually seasoned with olive oil, herbs, and salt. Sometimes it is dressed with other toppings like onions, and cheese, but you know me, simple is the way to my heart. The biggest characteristic to a Focaccia are the wells, or dimples, that are pressed into the dough with your fingertips before baking. These wells help the olive oil and the herbs penetrate and seep into the Focaccia, making it more flavorful throughout and not just the outer crust.

I did a little rant in the beginning of this post, and it was because some restaurants out there claim they are giving you Focaccia, when in reality, it’s just a thick piece of bread with a cheap brush of canola oil and an even cheaper pinch of herbs. And by “some restaurants”, I mean all of them. At least, every single one I’ve encountered. Don’t go describing to me all these wonderful flavors and tastes, telling me it’s sprinkled with herbs and brushed with olive oil, and then give me something that looks like it was part of a TV dinner.

Don’t piss in my ear and tell me it’s raining.

Maybe I’m just spoiled? Maybe I expect too much? Or, there’s a very good possibility that a lot of people out there just don’t know what the hell they’re doing.

I’m not perfect by any means. I can’t make you the worlds greatest Focaccia and I’ve never had the best. All I know is that when it’s done right, it’s simply amazing.

Now, I know I've put this on an insanely high pedestal when in the end, it really is just bread. And bread is one of those things that not everyone enjoys or has time to make, usually because of having to deal with or simply buying the yeast that makes bread rise. So considering that and my views on making cooking at home simple and worth doing, this recipe will not be your typical Focaccia.

This is going to be a Yeastless Focaccia.

O0o0o0.. Did you feel that? ..Say it again...

Yeastless Focaccia..

....Nah, it wasn't the same.

I've been using this recipe for a very long time and even though it doesn't have any yeast, and doesn't rise like a normal bread would, the flavor and the magic is still there. This is an amazing trick to have up your sleeve for pasta night, especially if you don't have anything to make a garlic bread with. It can be done in a cinch and the results are spectacularly better than any Fauxcaccia you may encounter in the wild. 

See what I did.. there.... Ok, fine, here it is!


Yeastless Focaccia:   (adapted from here)


                               1 cup ~ Water
                       2 1/4 cups ~ All-Purpose Flour
                    3 teaspoons ~ Baking Powder
                      1 teaspoon ~ Salt
                     ½ teaspoon ~ Garlic Powder
                      1 teaspoon ~ Dried Rosemary
                      1 teaspoon ~ Dried Thyme
                     ½ teaspoon ~ Sea Salt
  At least 4 Tablespoons ~ Extra Virgin Olive Oil
                               ¼ cup ~ Grated Parmesan Cheese


Notes:


  • This will be good for 2 or 3 days if you keep it air tight. The more it sits, the more tough and chewy it'll be. But hey, if you make it right (a monkey could make it right), it won’t last the first day.
  • If you don't have sea salt... Use whatever salt you have. Seriously. Don't bother me with such questions. 

Alright, let's get to bakin':


  • First, wash your hands, because they're going to get dirty. After that, line a sheet pan with aluminum foil and spread around about a tablespoon of Extra Virgin Olive Oil. If you don't like foil, go naked.


  • Next, in a medium sized bowl, add the flour, baking powder, salt and water, and mix it with your hands till a dough comes together. Yeah, you can use your mixer with a dough hook, but really, why waste the time? Your 2 hands are the best tools in your kitchen. Ok, stop looking at your hands in amazement and get back to the dough.. It should be a little sticky


You do not want a clean dough, you want it to be sticky. But if you can't even handle it, add a few more tablespoons of flour. You want it to be sticky enough to grab on to your skin, but not so much that you'll have dough stuck all over your hands when you handle it.


  • Once it's good to go, plop it onto the oiled tray. Rub it on the tray a bit and flip it over; it's easier to handle with a little oil on top. Now work it with your fingertips and spread it around until it's about a 1/4 to 1/2 inch thick. I like to make mine into an oblong, circular shape. You could shape yours to look like a pig if that floats your boat, just make sure there are no holes anywhere and the thickness stays consistent throughout. Otherwise, thinner parts will cook quicker and give you more crispier areas than others.


  • Once it's the shape you want, start dressing it. Take the garlic, herbs and sea salt, and sprinkle them evenly all over the dough. When it's covered with the yumminess, drizzle about 2 tablespoons of extra virgin olive oil over it and spread it around, making sure you coat the entire thing, sides and all. Now pretend your fingers are dancers and the dough is a dance floor. Go crazy and make dimples everywhere using your fingers.


  • When it looks like a golf ball, set it aside and turn your oven on to 425°. I say turn it on now instead of when you started because I found it comes out better if you let the dough rest a bit. It may not have yeast, but it's still dough, and you just beat it up like it owed you money so let it relax a little.


If you don't know why you should let dough rest, it's because of the gluten that was formed during kneading. Look at it like this: If you give that gluten time to rest, the dough will be happier and relaxed, therefore it'll give you a more tender bread when it's finished baking. If you make a dough, knead it, and throw it in the oven like you don't care about how it feels, the dough won't be happy and it'll be tough and chewy when it comes out.

There's a joke in there about letting your tired spouse rest, but I'll leave it alone :-)


  • When the oven is preheated, put it in and set the timer for 20 minutes. When you're done twiddling your thumbs for 20 minutes, take it out, but put the knife down because it's not ready yet. Sprinkle the Parmesan cheese on there and then drizzle that last tablespoon or so of olive oil on top. When you're done moping because it's not ready yet, put it in the oven for another 5 minutes


When that timer goes off, do your happy dance because it's done. Cut it up however you want and put whatever is left over in something airtight.


But good luck with that left over part...


Friday, August 3, 2012

Garlic + Bread = Love


Have you ever had a giant bowl of pasta, then afterwards still feel a little empty inside? Like something was missing and you just couldn’t figure out what? Well I’ll tell you what was missing…

Garlic Bread.

If you’re having pasta, no matter how much of it you have in front of you, there should always be a plate of garlic bread near by. Matter of fact, I’m sure that’s written in stone somewhere.

And I’m not talking about Olive Garden garlic breadsticks here. I’m talking…

Oh no.. Don’t you sit there and act like you never went to Olive Garden and had their breadsticks. Everyone has. Heck, it’s all people eat there, it’s a proven statistic. A sad one, but it was documented.

But I’m not here to talk about Olive Garden or how fake and terrible they are. I’ll save all that rage for another post.No, let’s get back to the matter at hand. Garlic bread. Real garlic bread. You know, with actual garlic.

I know I say it in every post, but I can’t stress the simplicity of this. If you are that person who buys the loaves of frozen garlic bread in the store, then you really need to just stop. Seriously, don’t buy anymore, those are disgraceful. Pulling that out of the freezer, into the oven and calling it garlic bread is like saying you’re going out for an authentic Italian dinner, and then driving to the Olive Garden.

Damn Olive Garden, just keeps on coming back up. (zing!):


Garlic Bread:


                    1 each ~ Baguette or other long crusty bread
       1 stick (½ cup) ~ unsalted Butter
     1 ½ tablespoons ~ Fresh Garlic, chopped
         2 tablespoons ~ Cilantro, chopped
                 To Taste ~ Salt and Pepper


Notes:

  • I have a few recipes for garlic bread. This is the more “party friendly” one since it’s more presentable and personal. I'll do another one soon.
  • If you don’t like Cilantro for some absurd reason, you can very easily substitute it for plain ol’ parsley.
  • The salt you add can make this “ok” or it can make it “addicting”. So keep that in mind when seasoning.
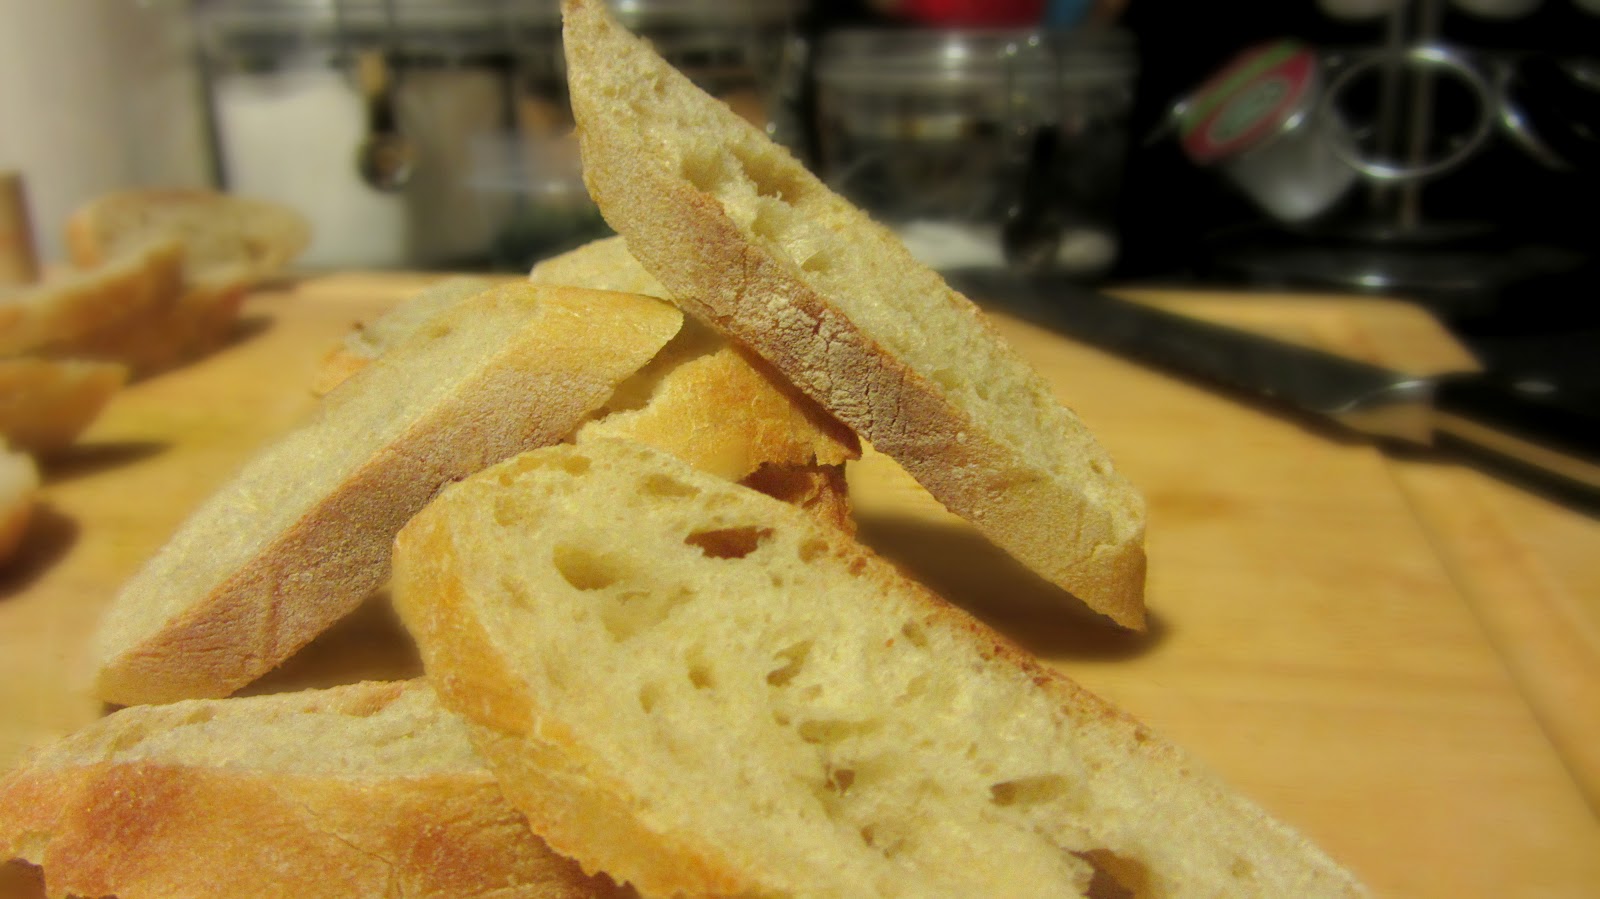
  • When cutting the bread, if you want crispier bread, cut it thin. I've cut it as thin as a quarter of an inch. This is the size that is optimal for a party platter or for general company since it’s easy to consume and doesn't feel like a lot at once. If you want a more hearty, chewy bread then cut it thicker, about 3/4 of an inch to an inch. This is good for dinner time where one piece can soak up some sauce and last you a bit.


Alright, fun time:

  • First things first, turn on the oven to 350°. Then chop the garlic and cilantro. I chop them both a bit rough since I don’t mind biting into a bigger piece of each. Once chopped, put the butter, garlic and cilantro in a pan and turn the heat on low.


  • While it’s melting, cut the bread at a bias. 


If you don’t know what a bias cut is, check out this informative video that’s probably going to make you scratch your head at the simpleness it teaches. Bias means to cut at an angle, and it’s mostly for presentational purposes. You won’t be using the ends, but keep them for tasting the mixture.


Thinner

Thicker


  • When you’re done cutting the bread thin or thick depending on your preference, the butter should be melted. Add a bit of salt and pepper to the butter, stir, then dip one of the ends in and taste it. What you taste is what the end product will be like, so if you need more of salt and pepper, you’ll know here instead of at the dinner table.


  • When it’s to your liking, line a sheet tray with aluminum foil then spoon some of the butter mixture onto the tray and spread it around with the back of the spoon or brush until the entire tray is covered.


  • Place the bread on the tray while giving it a little swirl to get some butter underneath. When you have all the bread on the tray, get a pastry brush and brush the butter mixture on top of the bread. Put enough for a nice coating but don’t pour it on or you’ll have a soggy, greasy bread. If you don’t have a brush, just use a spoon, a fork, your fingers, seriously, who the hell cares?


  • Now depending on the thickness of how you cut the bread, you’ll want to check how long you put it in the oven for. If the bread is thin, you’ll want to check it in about 8 – 10 minutes. If it’s thick, it can probably go 12 – 14 minutes


Whichever you did, don't walk away and forget about them. They're going to be done when the edges are slightly golden. If you want them more golden and crispy, then by all means, you won't hurt my feelings.

Enjoy, and don't forget to save some for everyone else.