Showing posts with label Cookies. Show all posts

Thursday, December 13, 2012

Sugar and Spice...


Out of everything I make during the holidays, this has got to be my favorite.

I'm a lover of spices and can appreciate the assault on the senses they can do. I think that's a big reason why I love holiday baking. I get to abuse things like cinnamon, nutmeg, and pumpkin pie spice, and no one gives me any lip about it. And you know I'm a cinnamon freak so this time of year is just dangerous.

I've been making these in particular for the last 3 or 4 years. What's special about this year though is I'm finally making them the way they're supposed to be made... With cinnamon chips!!!


Yup, cinnamon chips.

Those little morsels of goodness were my unicorn. For the past 4 years, every holiday season I was out and about for at least 2 weeks before finally giving up for the year. Combing supermarkets, turning those organic food markets that smell like fish and hippies upside down, always looking for these mythical chips. I would ask the stock person in every store that I went to, and every single one of them replied with the same dumbfounded look. As if we were in the wild west and they were a bartender and I just walked into their saloon wearing a pink cowboy outfit with tassels all over it asking for a glass of ice water. But then one day about a week before Thanksgiving, we were walking around Walmart and I saw them. Sitting right there next to the chocolate chips as if they belong on the same shelf. I couldn't believe my eyes. It took me 11 years, but I finally understand why the Nazgûl went bonkers every time Frodo put on The Ring. That's exactly how I felt, like I finally found the one thing I've been after for so long. And in Walmart of all places!

Anyway, get out there to your local Wally World and give them a try. They're creamy like chocolate but have a cinnamon flavor. I'd be lying if I told you I didn't eat a few handfuls. 

It's ok though, I can do that. I bought like 4 bags.


Spiced Cinnamon Coins:

                     2 sticks ~ Butter, SOFTENED
                     3/4 cup ~ Dark Brown Sugar
                      2 each ~ Eggs
         1 1/4 teaspoon ~ Cinnamon
            1/4 teaspoon ~ Nutmeg, freshly grated
            1/4 teaspoon ~ Ground Ginger
            1/4 teaspoon ~ Pumpkin Pie Spice
            1/8 teaspoon ~ Salt
               1 teaspoon ~ Vanilla Extract
                2 1/2 cups ~ Flour
                     2/3 cup ~ Cinnamon Chips, coarsely chopped
                                     Turbinado Sugar


Notes:

  • Notice how I put "softened" in all caps. That's my attempt to remind you to put out your butter so that it softens. I know I might as well be screaming at the wall but it's worth a shot.
  • I used dark brown sugar because I had it and the flavor is deeper. You can use light brown sugar or regular sugar if you must. 
  • Coarsely chop the cinnamon chips as best you can. You don't need to chop them all, but at least half would be nice. If you leave them whole, when you go to cut the cookies later, it can rip the dough apart. Yeah, it's easy to put back together, but still, do what I say, ok? Ok. You don't want big chips everywhere anyway. You want little chunks here and there, don't you? Alright then, 
  • If you don't know what Turbinado Sugar is, it's basically natural brown sugar or sugar in the raw. It's a coarse sugar that gives a great crunch. I love using it as much as I can and in this recipe it's almost a necessity. It helps deliver that crispy outside of the cookie. You can find Turbinado sugar just about anywhere.
  • Now, if you have my problem that I had for so long and can't find cinnamon chips, the alternative that I used for 4 years were butterscotch chips. Found right next to the chocolate chips, it goes nicely with the spices of the cookie. If you use butterscotch chips, up the ground cinnamon by about 1/2 teaspoon. 
  • A fair warning: These cookies are small, about an inch wide at best. And on top of that, they're addicting. That has to be the worst combination in the history of sweets. You can easily have 10 of them before you know it. This recipe will give you about 40 cookies depending on how much you roll and how thin or thick you cut, so plan accordingly. If you think 40 cookies is too much, who cares? Make half and freeze the other half. But I wouldn't freeze more than a month.


Time to make some coin:


  • Take the softened butter and sugar and cream it in a mixer. Not creaming it till light and fluffy, but just until it's a nice paste. The dark brown sugar is going to make it look like mud. It looks disgusting, but it's great!

  • Next add the eggs one at a time until combined, then add all the spices, the salt and the extract


  • Once it's combined, take out the bowl and with a spatula, fold in the flour and the cinnamon chips


Yeah, I have a purple spatula. Wanna make something of it?!

Now the fun!

There are a few ways to do this:

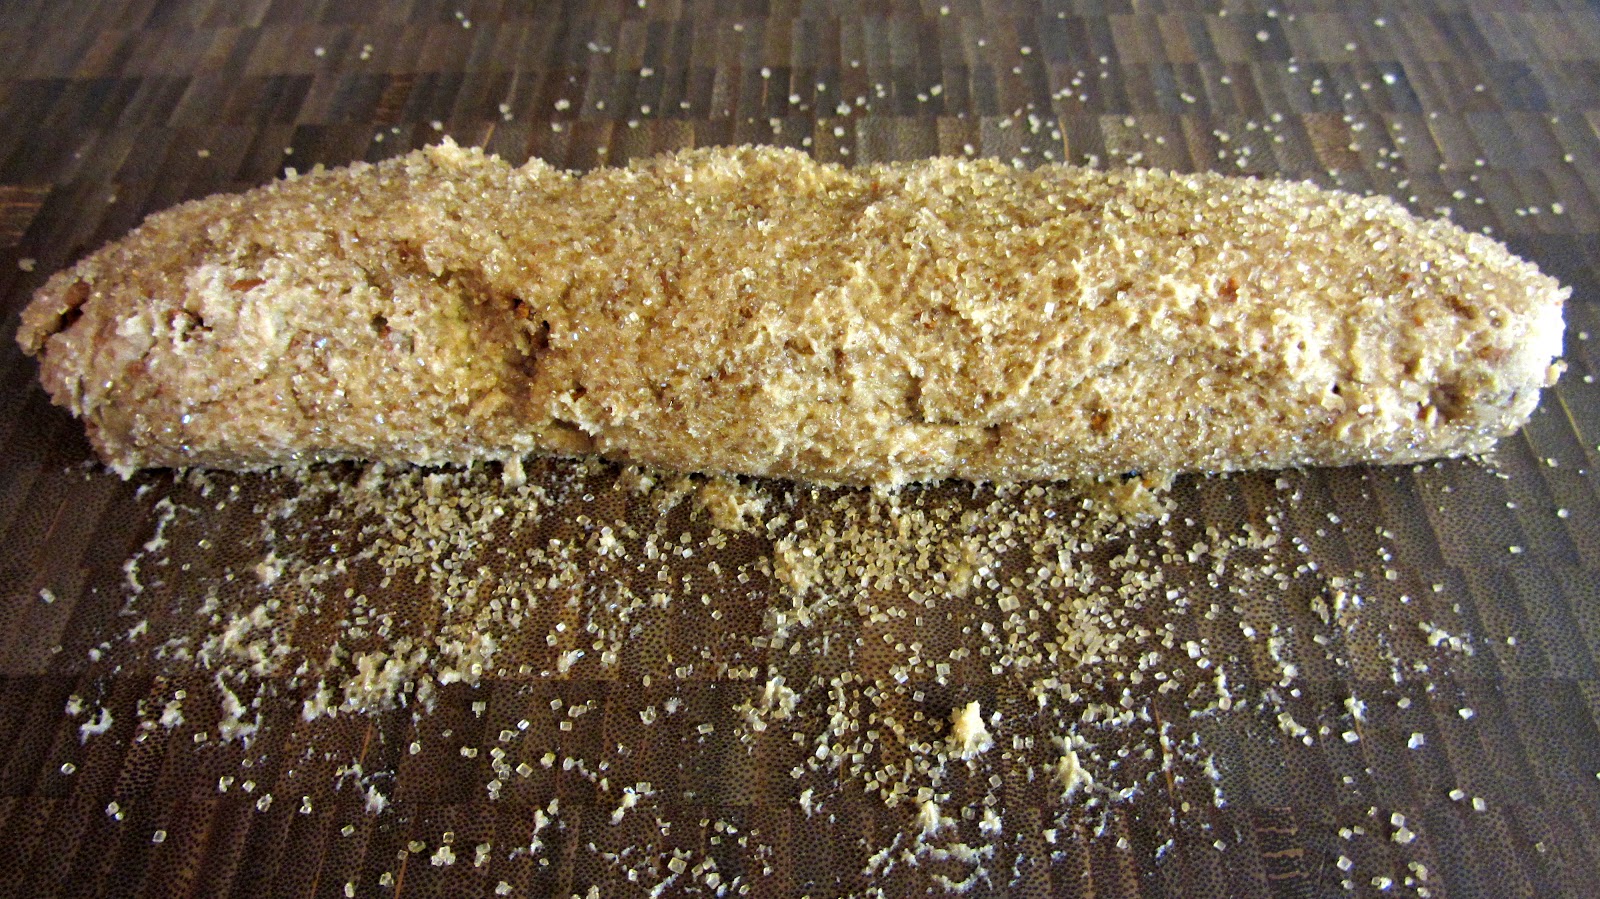
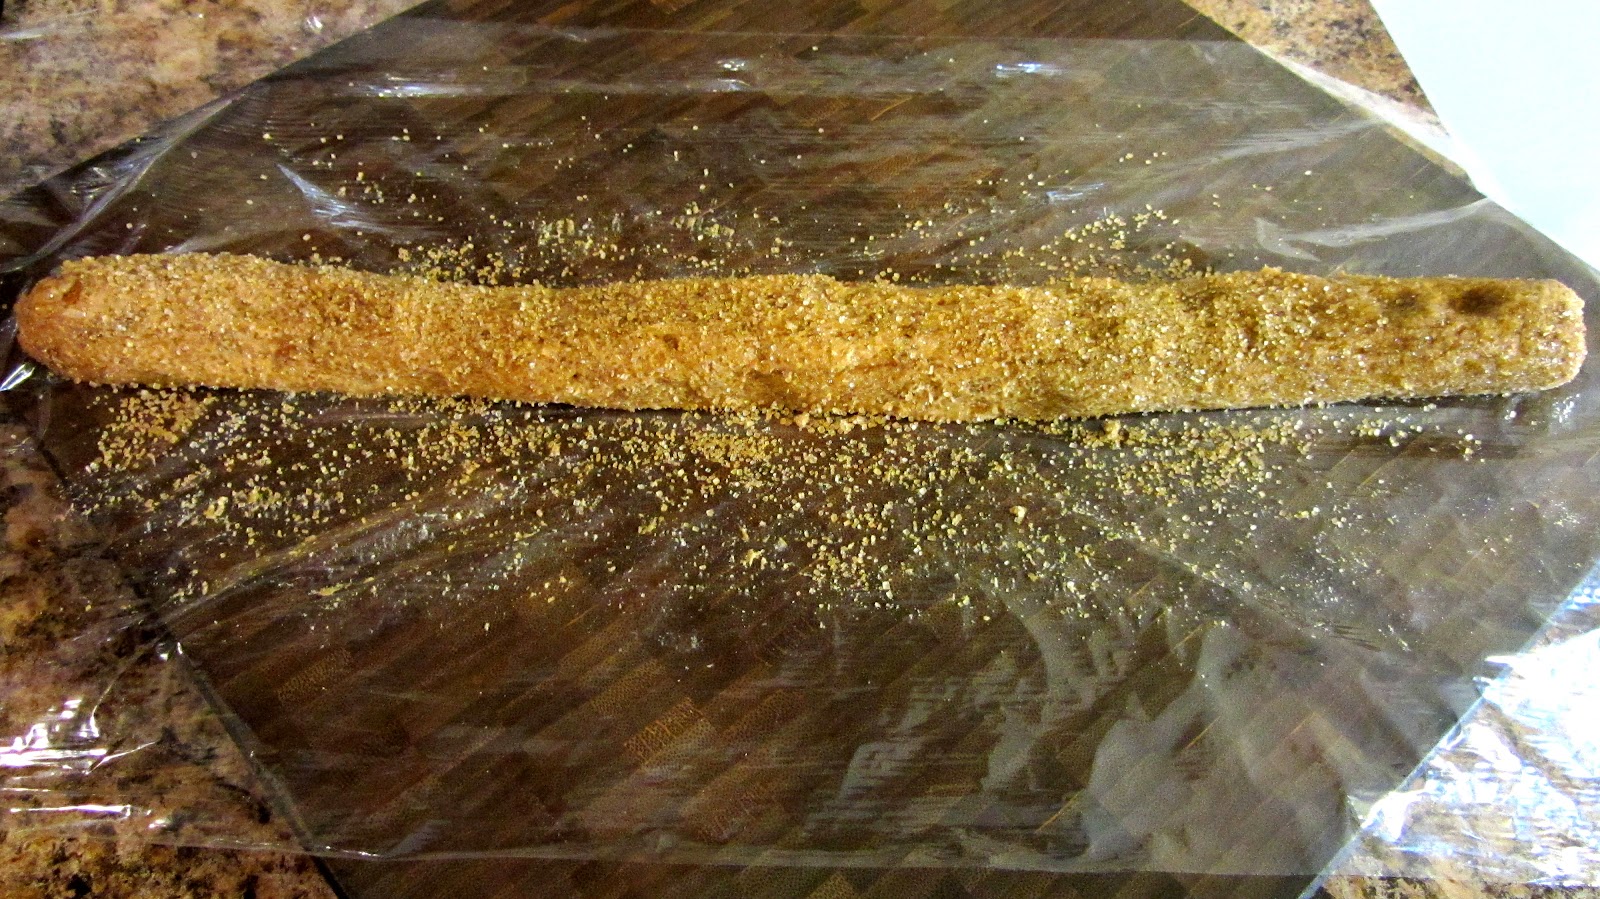
  • First, if you have a work surface you like for such things, sprinkle some of the turbinado sugar on it and plop half of the dough on to the sugar. Work it into a log shape and then roll it till it's about 1/2 inch thick. Take the rolled dough and transfer it to a long piece of plastic wrap and roll it up and close off the sides


  • Or, if you have patience, you can do everything I just said on the actual plastic wrap. Covering the dough with half the wrap and squeezing it out, then pulling the other side over to squeeze it out some more, then rolling it until you get your long, 1/2 inch thick rope of dough.


  • Either way will work. Whichever you do, be sure to close it off good because from here you put the rolled up dough into the freezer for at least 2 hours to chill. Like I said, you can leave it in there for about a month, but let it cool off for at least 2 hours. That way when you go to cut it, it will be a much easier process. 


  • Once the time has passed, turn on your oven to 350. Take the dough and roll it in a little more turbinado sugar. Get a nice coating on there and then cut the dough about a 1/4 of an inch thick. Place the coins about an inch apart on a parchment lined cookie tray that was sprayed with cooking spray. Something I like to do at this point is grate some more nutmeg on the top of the cookies, but I'm spicy like that. Put them in the oven for 16 - 20 minutes, until the edges get a little color and the center is a little firm


And that is that. Put them somewhere to cool and you are done. If you baked them right they should be nice and crispy around the edges, enough to give you a good crunch, and somewhat chewy in the center. If you cooked them too long, they'll be crispy all the way through. Which is a big "who cares" because they'll still be freaking good. I actually like them all crispy.


These puppies are small but they pack some flavor. Don't be mad at me if you eat them all in one shot.

Easter Egg: If you haven't noticed, this is the cookie that is pictured in the header of my blog. Only more Pac-Man-y.

Wednesday, December 5, 2012

If Milk Could Dream...


Still the first week of the month and I already feel like I'm slacking. I have quite a few holiday goodies to throw your way so I really should get on the ball here. I mean, here I am, a cookie fanatic missing out on the cookie making season. If this blog has done anything consistently well, it's making me ashamed of myself. 

What? I said cookie and you stopped caring about everything else I was saying? Yeah, I get like that too. I don't know if that has anything to do with my love for the holidays, but I'm not one to question such things. Cookies are life's way of saying, "hey... I like you." But that's only on good days. On bad days, life gives you lemons. It's almost always a cookie when it's a good day.

So I guess this is my semi-official introduction to my Holiday Cookie Posting Extravaganza! (working title). Semi-official because maybe one day I'll feel like something other than a cookie and I don't want to be held accountable for lying to you. If you want all the legal information, it's in the fine print at the bottom of the page under the copyright information that's there for decoration since no one really looks at this blog.

Anyway, cooki..er, Holiday Cookie Posting Extravaganza! (working title)!

This cookie is a showstopper. It's made its rounds through the blogging world and Pinterest and has found its way into my belly on more than one occasion. I have to thank CanadianDana for introducing me to this behemoth for the first time a few years ago. I have to say, it's fairly breathtaking if you've never seen one. I'm willing to bet that if this is your first time seeing a cookie of this stature, you're probably still looking at the picture and you're not even reading this. It's forgivable and understandable. Imagine how the milk feels! I'd bet this is as close to a ménage à trois that milk is ever going to get...


Oreo Stuffed Chocolate Chip Cookies: (adapted from here)


                                 2 sticks ~ Butter
                                    1 cup ~ Brown Sugar
                                    1 cup ~ Sugar
                                  2 each ~ Eggs
                       1 tablespoon ~ Vanilla Extract
                                  4 cups ~ Flour
                           1 teaspoon ~ Salt
                           1 teaspoon ~ Baking Soda
                        3/4 teaspoon ~ Cinnamon
                        1/8 teaspoon ~ Nutmeg, freshly grated (optional)
                                     1 bag ~ Chocolate Chips
                                 At least ~ 12 Oreo Cookies


Notes:

  • I used the Candy Cane stuffed Oreo's. Because, you know, it's Christmas time. I admit, they're a little weird at first. But after a few bites you're used to it. 
  • You can use this recipe any time of year with regular Oreo cookies. 
  • Heck, you can use this recipe with anything really. Doesn't have to be Oreo's. You can use Reese's Peanut Butter Cups... Like I also did. 
  • If the dough does not feel workable, add a little more flour. You want to be able to shape it without it sticking to your hands.
  • If it is sticking to your hands, try washing your hands and drying them. Dry them good because the moisture in your hands could cause the dough to stick to them.
  • If you're still having problems, refrigerate the dough for about an hour and give it another go.
  • The recipe can make about a dozen cookies. But trust me, you don't need any more than that. 


I hope you have room in your kitchen for the biggest cookies you've ever made:


  • Preheat the hotbox to 350.

The first step to making these is probably the most important step in all of cookie making. Don't get scared, come on, get out from under the table. I'll break it down for you:

It's called the Creaming Method. It's a method with a specific order of putting your ingredients together and for good reason. It gets its name from the first step, which is creaming together the fat (butter or lard) and the sugar. It's named after this step because it is the most important step. Make sure you cream it right because you're setting the stage for the rest of the show. When creaming the sugar and fat, you're incorporating air into the fat, which will essentially be the base for your cookie. So when you bake the cookies, the air you created will act as a leavening agent of sorts, expanding with the heat, and creating a lighter, fluffier cookie.  

I might create a separate post just for discussing the Creaming Method soon. It's that important.  

But that's later. Now we continue this..

  • Take the butter and sugars and cream in the mixer until it's light and fluffy. Don't forget to scrape the edges and the bottom. Once it's fluffy, add the eggs one at a time as well as the vanilla, while mixing slowly.


  • The easiest way to do the next part is to take all of the dry ingredients and put them into one bowl. Then add a third of the dry ingredients and slowly turn on the mixer until it is just combined. Turn it off and repeat 2 more times until the dry ingredients are gone. Finally, add the chocolate chips and mix them in until they're well incorporated.


Now the fun part!

  • Spray a parchment lined cookie sheet. Then take an Oreo cookie and place a spoonful of the cookie dough on the bottom and another spoonful on the top.


  • Now with your hands, mold and press the dough around the Oreo till you form a general cookie shape. You want it completely covered so if you feel like you need a little more dough then add some on the spots where needed.


In case you're wondering.. Yes, it is a lot of dough.

  • Once they're made, put them on the cookie sheet at least 1 inch apart, 1 1/2 to be safe. Put them in the oven for about 10 minutes. I say "about" because everyone's oven is different. My batch actually stayed in for around 15 minutes. They're done when the edges and bottom are a nice golden brown. So keep an eye on them.


And that's about it.


I'd like to take this time to state once again that these cookies are freaking huge. I have fairly big hands and i can't wrap my fingers around one. So please, be very careful if you have small children in your home and these are on the counter. If a cookie falls on a child's head, it could knock the kid out cold.


Oh! I forgot. I did mention that I also made some with Peanut Butter Cups, didn't I? Well yeah... Just do everything I said, but instead of Oreo's, use Reese's Peanut Butter Cups and boom! 


Yes, they're amazing.

And you can stop drooling now...

Friday, October 26, 2012

One Cookie To Rule The Fall


I cannot begin to describe the shame I feel I have brought myself. My disappointment Is the size of Great Pumpkin, Charlie Brown! Why? You know why. Don't sit there and act like you haven't been shaking your head at me for weeks. Look at me, here, with this food blog, and I have not posted one thing... not one thing about fall yet. It's practically November and here I am talking to you about garlic bread and spaghetti!!

No, there is no excuse. 

Ok, maybe. I've kinda been moving into a house. And if you know what moving entails then you're already nodding your head in agreement.

But other than that, NO EXCUSE! 

When my son goes to school in a few years the kids will tease him and call him names because of my shameful act. I feel terrible, I really do. Tell me, what can I do to make it up to you?

Would a couple of posts in a row of nothing but enticing, fall inspired sweets put me back on your good side? Will all this be put behind us, forgiven and forgotten, like nothing ever happened, and then we can move on? 

Maybe? Ok, that's a start. Here, maybe this will help...


Pumpkin Pie Cookies


Ah... Look at your eyes open up. A little smile creeping on. Yeah, go ahead, shake it off, it's ok. I'll pretend like I didn't see it. I'll just go on...

Albert Restaino, friend of mine from twitter dubbed this The Year of the Pumpkin. And he's right, it does feel like it's everywhere this year more than others. The flavor, the scent, the spice.. He's right, and I'm surprised there's not a clothing line of some sort. But it's as if everybody everywhere is head over heels in love with everything pumpkin. I know Tyler Durden is somewhere shaking his head about it, calling it a fad, and I usually agree with him. But I just can't this time. Fall can give you all sorts of warm fuzzy feelings, and for good reason. If you recall, since moving to North Carolina, I have found myself a total fanboy of the seasons. Fall was one of my favorites to begin with. Tied, if not, slightly ahead of winter. But being here, seeing the trees change colors, the crisp air come in, I swear I sequel like a little girl every day.

But there's no fad when it comes to Pumpkin Pie. No line of hipsters waiting for a slice of it outside a coffee shop on a brisk October morning. Nope, Pumpkin Pie has been around for a long time. Recipes have been handed down for generations, your grandparents can remember eating it as kids, you get the idea. It's a fall staple and an OG in the pumpkin game.

So when I was trying to figure out what my first fall post should be about, Pumpkin Pie stood out to me. It's the epitome of fall. But at the same time I wanted to do something small, something easily consumed for get togethers. So when I was introduced to this recipe by Annemarie Zaitz on Google+, it was perfect timing. It's called a cookie, but it can also pass as a mini pie. I'm sorry if at any point in this post your mind explodes.

Ha, no I'm not:


Pumpkin Pie Cookies: (adapted from Here)


Cookie base/topping:
                    
                    1 1/4 cup ~ Flour
              1/2 teaspoon ~ Baking Soda
              1/4 teaspoon ~ Baking Powder
                          1 cup ~ Brown Sugar
                       1/4 cup ~ Sugar
              1/2 teaspoon ~ Pumpkin Pie Spice
                       1/4 cup ~ Cold Butter
                     4 ounces ~ Cold Cream Cheese

Pumpkin Filling:

                    4 ounces ~ Cream Cheese, softened
                 1 teaspoon ~ Vanilla Extract
              1 tablespoon ~ Sugar
             2 tablespoons ~ Brown Sugar
             2 tablespoons ~ Flour
             8 tablespoons ~ Canned Pumpkin
               1/2 teaspoon ~ Pumpkin Pie Spice
               1/4 teaspoon ~ Cinnamon
               1/8 teaspoon ~ Whole Nutmeg, freshly grated


Notes:

  • I know what you're thinking. It sounds like a lot, but it's not. 
  • You're gonna need muffin pans so I hope you got em. I used regular and mini. From this recipe I was able to get a full pan of regular sized cookies and a full pan of mini cookies. 
  • DO NOT overmix the cookie base. Don't use your hands to mix it together because that's an easy way to overmix. Instead, use a fork and just smash, cut, and mix the butter/cream cheese with the dry ingredients. Take your time and you'll get a nice crumbly mixture.
  • Speaking of the crumbly mixture, if it starts to clump together and look like a dough, just forget it because that's the beginning of the end of the world.
  • Seriously, if it is more doughy than crumbly don't freak out. The crumbled look is for the topping, which can easily be replicated by just tearing up the dough into small bits and putting it on the top. It's not as easy as sprinkling crumbles, but it works.
  • If the dough is too sticky to press down into the pan, add a little more flour and mix. If it's fine but gets sticky halfway through then stop and wash your hands, nasty.


Alright, I hope you're ready for fall to sucker punch you in the freaking mouth:


  • Heat your oven to 350.

  • You're going to need two bowls. In the first bowl, add all the dry ingredients and mix them. You can use your toes to mix them, I don't care. I do care that you use a fork for the next part. Add the cold butter and cold cream cheese to the dry ingredients and use your fork to incorporate and "cut in" until you reach a crumbly state. Please don't overmix and destroy the world.


Why cold butter? I'm glad you asked!

The colder the butter and cream cheese, the better. When you're making a dough it'll usually call for cold butter to be cut in with a pastry blender or a fork. To be honest, in my 10 years of cooking, I have absolutely no idea what a pastry blender even looks like. But I've been using forks for like, ever. A couple of pulses in a food processor has been known to do the job too. You want something that will incorporate the cold butter with the dry ingredients in a way that won't cause the butter to be over mixed, and that won't melt the butter during the process. The cold temperature of the butter will keep it together and make it harder to be absorbed into the flour. This will not only give you more structure (like the crumble state we're looking for), but it will also assure the presence of at least a few chunks of butter in the dough. Whole clumps of butter in a dough, when baked, will provide pockets and give you a nice flaky crust. 

But that's more for pie-pie. We're making pie-cookies. We still need the crumble though, so I didn't drop that science for nothing.


  • Once you have a crumbly mixture, set it aside. In the second bowl add the softened cream cheese. If it's not softened, what's the matter with you? You knew you were making this and you knew it called for softened cream cheese. You should have left it out like an hour ago. smh. If it's not softened, which I have a feeling it's not, put it in the microwave for 10 seconds. You're looking for a whipped cream texture. Once it's ready, add everything else and mix


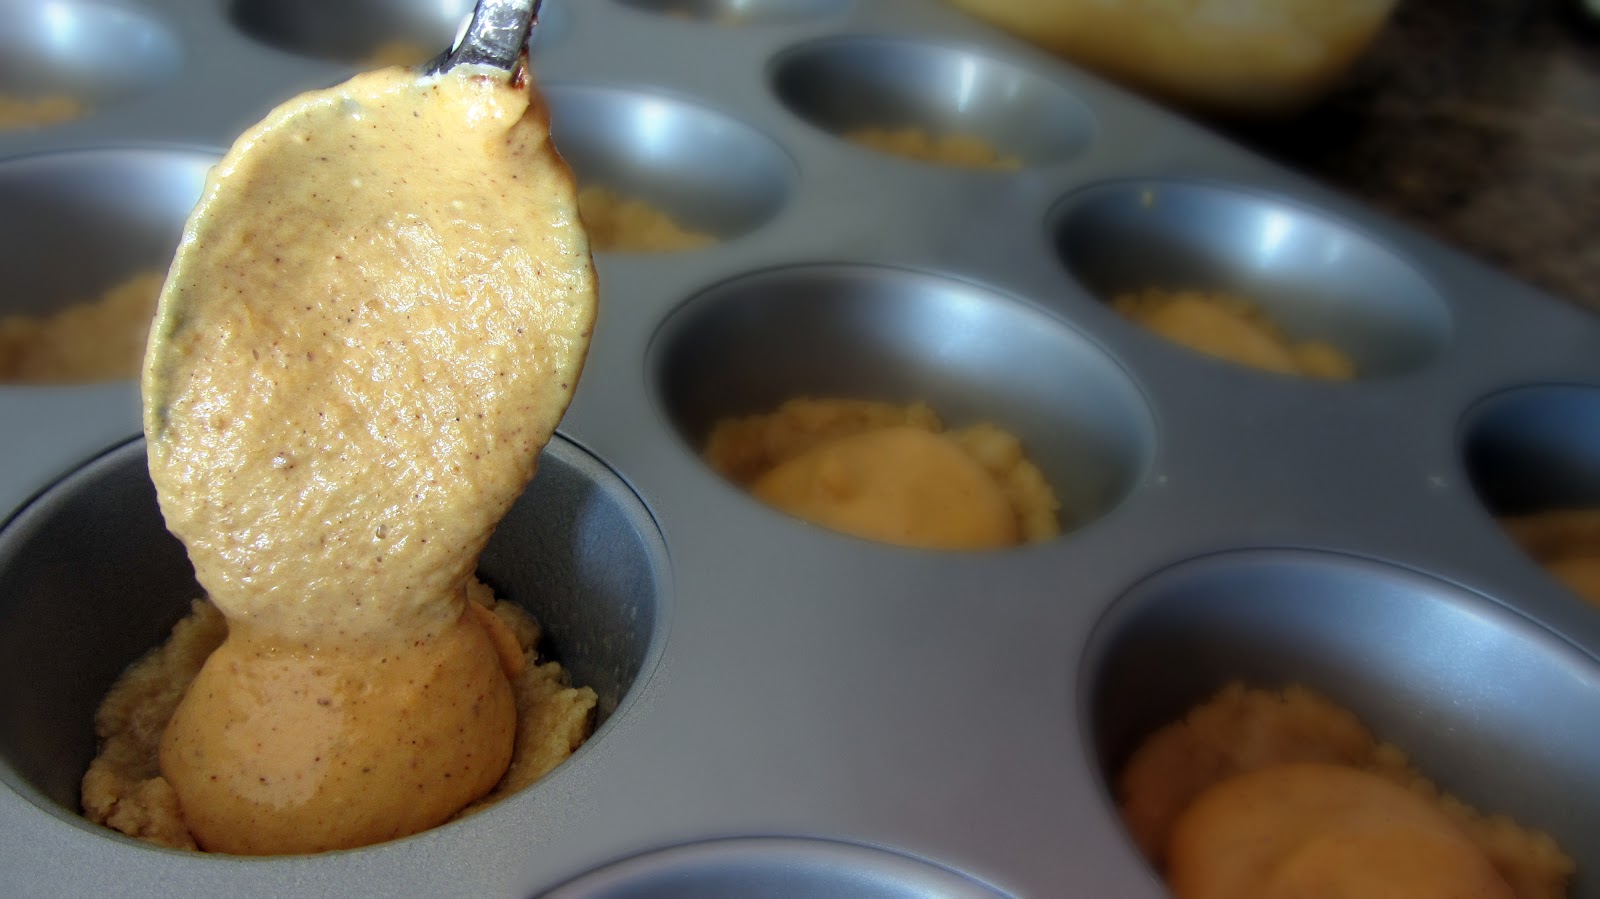
  • Take your regular sized muffin pan and spray it with nonstick cooking spray. Work one pan at a time that way you don't grease up more than what you need. Grab about a tablespoon of the cookie mixture and press it down into the bottom of the muffin cups.


Pretend like you're making really small pies, it's the same concept. You don't want too much or you really will have small pies instead of cookies. A tablespoon or a little less gave me a fairly good size cookie. 

  • About a tablespoon worked for the pie filling as well. Spoon in the pie filling and make sure to not go over the edges. Keep it in the center of the dough. 


  • Next take some of the crumbly mixture and sprinkle it on top. I don't cover the whole thing, just 4 or 5 tiny pieces spread out over it. If you're a cinnamon freak like me, put a pinch of it to top it off.


  • Put it in the oven for 16-18 minutes, until the cookie is golden brown on the top and edges. Let it cool in the pan for about 15 minutes then take a butter knife and slide it around the sides till they pop out


If you're going to make the cookies in the mini muffin pan: Do everything the same.. but smaller (mind=blown). Less pie filling and less dough for the base of the cookie, maybe about half a teaspoon. And bake it off for 10-12 minutes.


As you can see, a little addition you can do to these is add a few chocolate chips on top of the cookie before you add the pie filling. As it turns out, chocolate and pumpkin are not too shabby together.


And there it is! My first fall recipe! I hope it was worth the wait. I know other food bloggers are probably sick of fall by now. But you know what?


That's their own damn fault. No one told them to be crazy foodies with all that time on their hands.


Side Note: I don't know if you can tell, but I'm a little picture happy. You can thank all the natural light coming into the kitchen I have now. Sooooooooo much better than the dungeon I was cooking in before. Hopefully you'll see more pictures like this from now on.